Author: Support Flooring

  • The Complete Guide on How to Acclimate Your Flooring

    The Complete Guide on How to Acclimate Your Flooring

    Flooring acclimation is a topic that stirs plenty of debate in interior design and home improvement. While many assume it’s a non-negotiable step in the installation process, the reality is more nuanced. Not all flooring types require the same level of acclimation; in some cases, it may not be necessary. Let’s explore the concept of acclimation, when it matters, and whether it’s worth your time and effort.

    What is Acclimation and Why Does it Matter (Sometimes)?

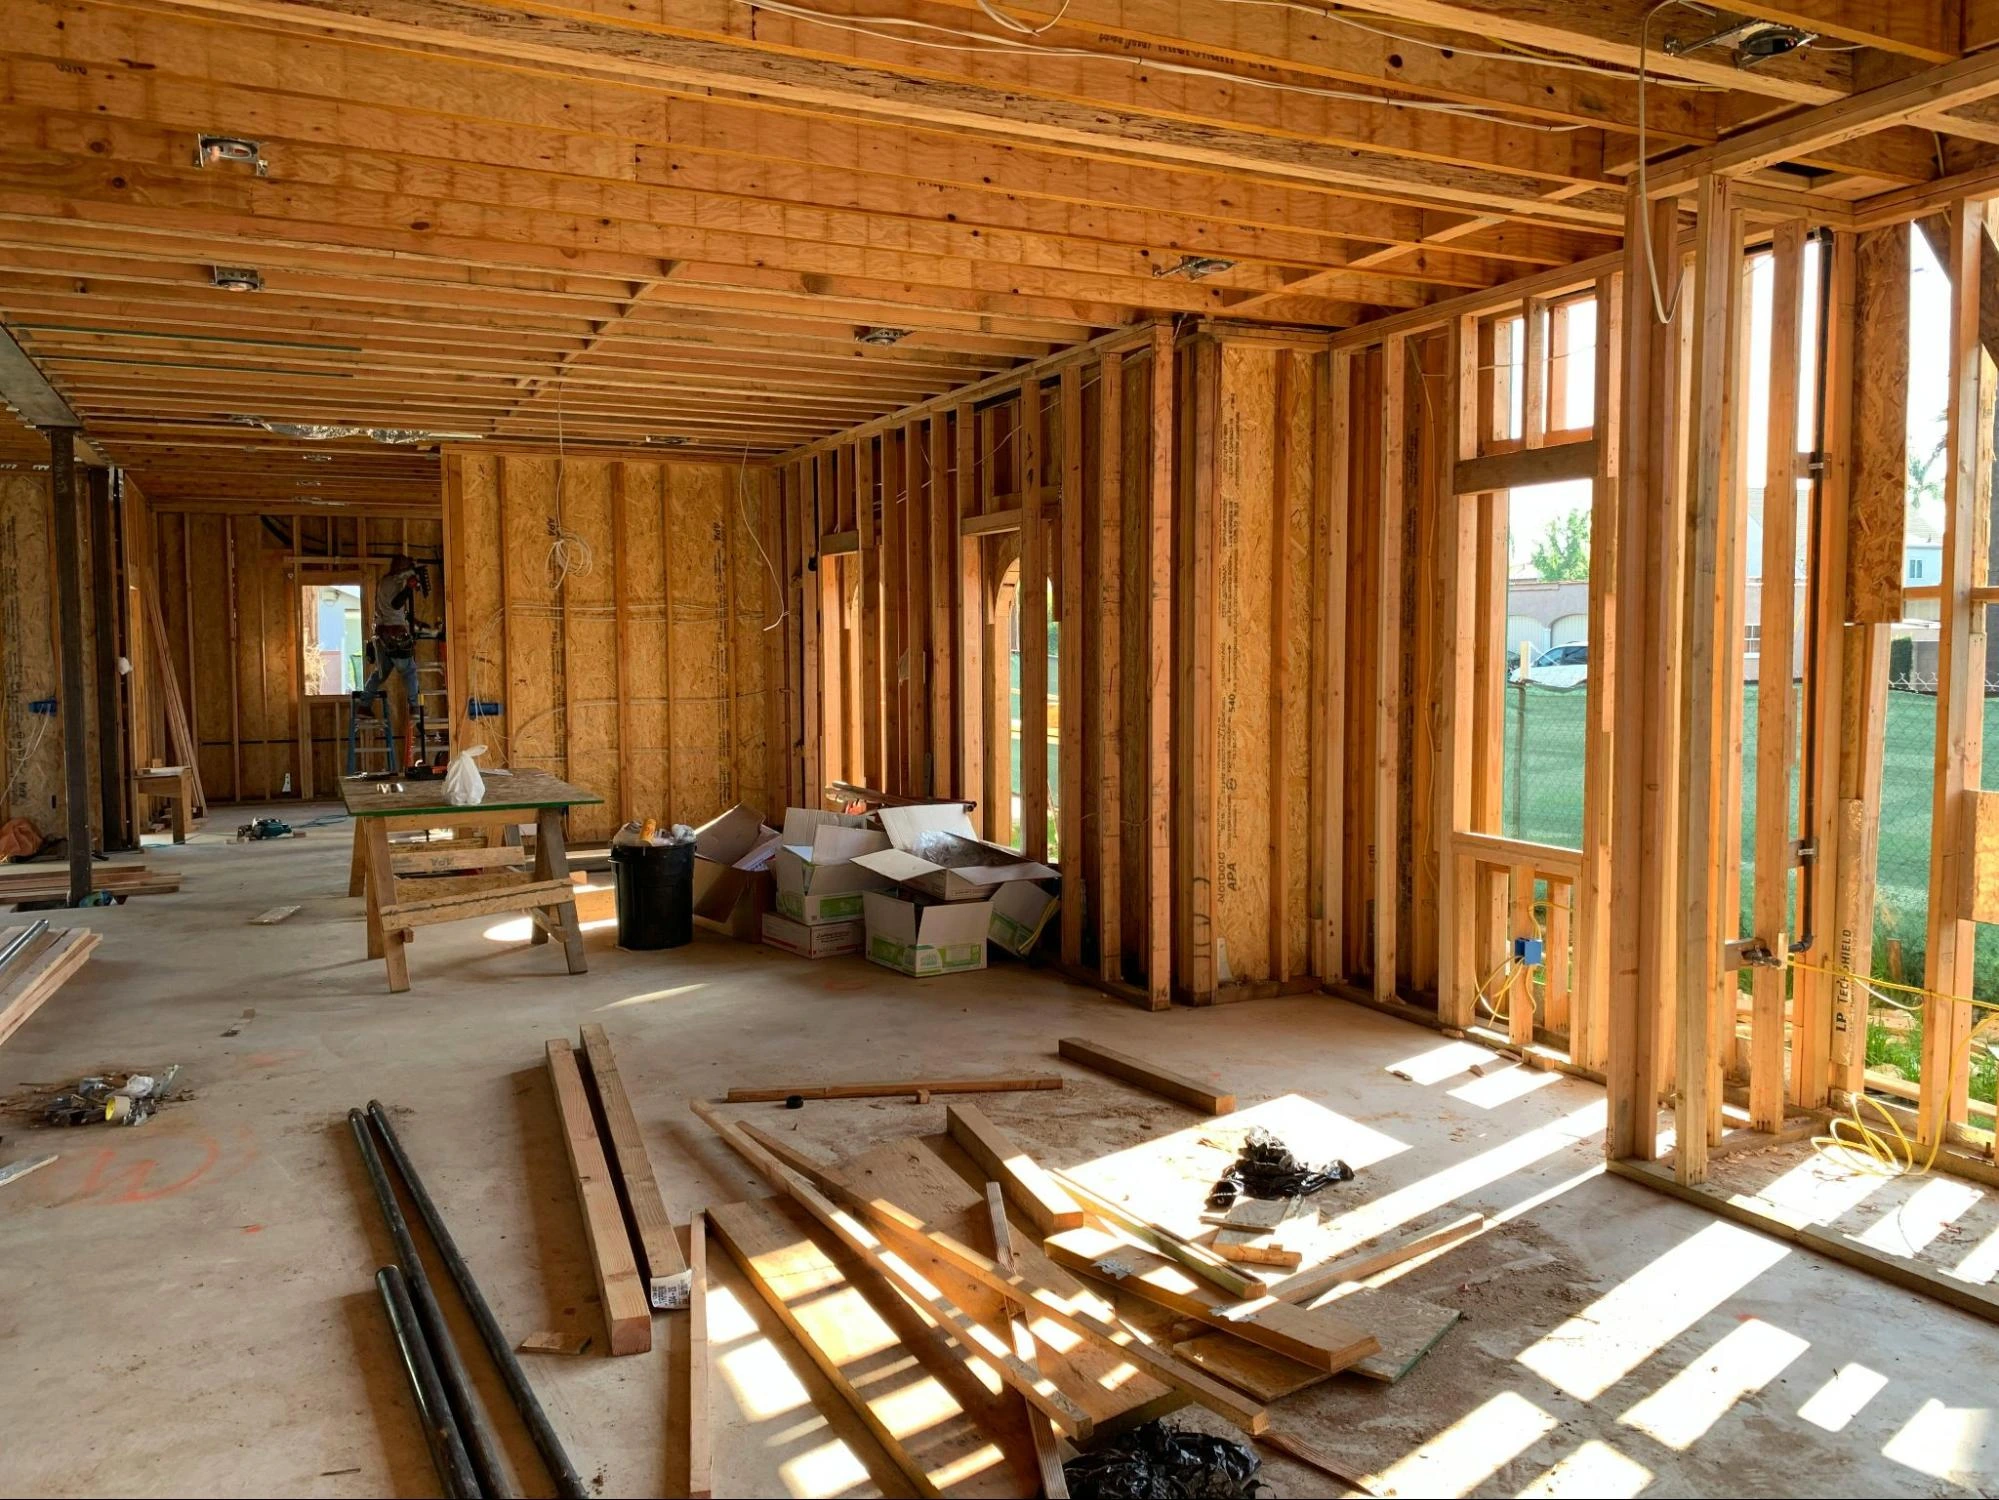
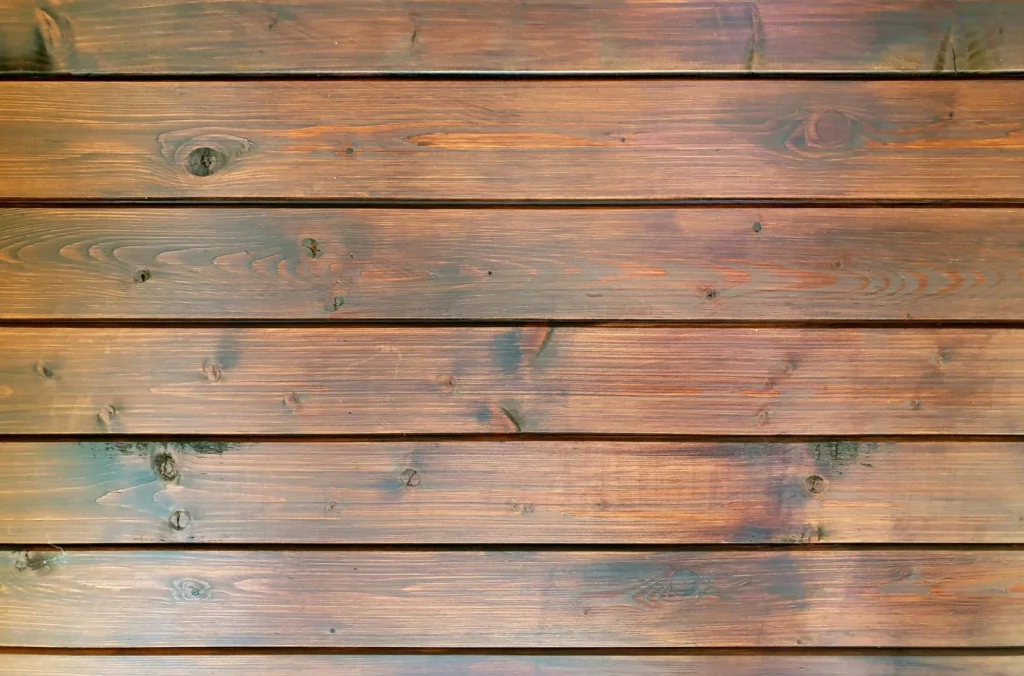
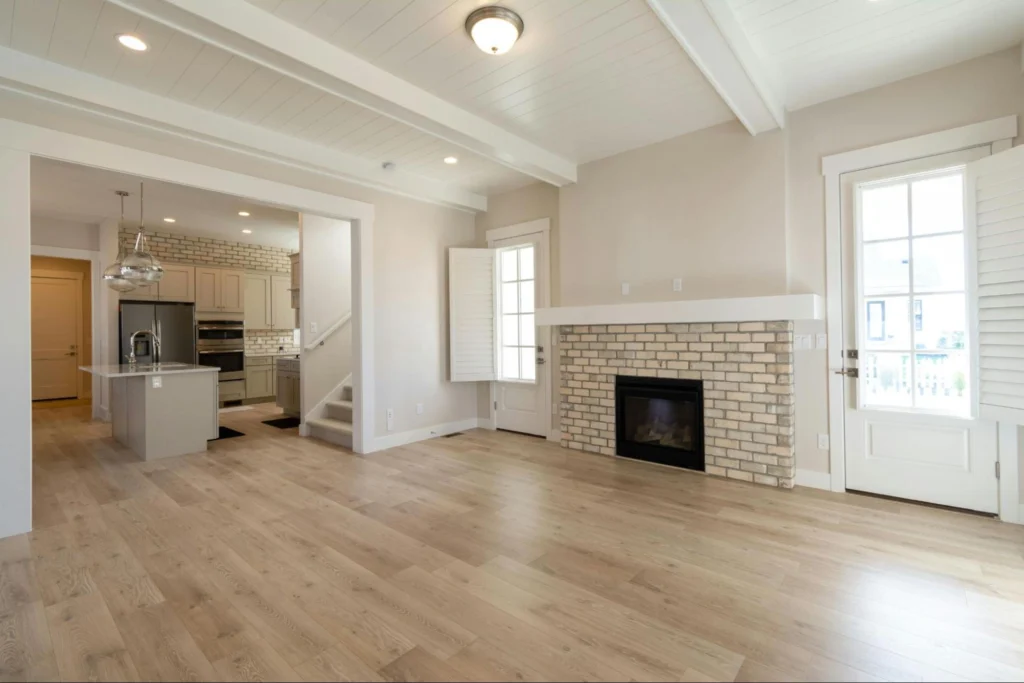
    Acclimation refers to allowing flooring materials to adjust to the temperature and humidity levels of the room in which they will be installed. This practice minimises issues like warping, buckling, or gapping after installation.

    However, not all flooring materials respond to environmental changes similarly. Traditional solid wood flooring, for instance, is susceptible to fluctuations in moisture, making acclimation a crucial step. On the other hand, modern engineered wood and vinyl flooring are designed to be more stable, often requiring little to no acclimation.

    Professionals in the industry have encountered varying outcomes: some installations have gone smoothly without acclimation, while others have suffered costly consequences. This underscores the importance of understanding your specific flooring type and its requirements.

    Is Acclimation Always Necessary?

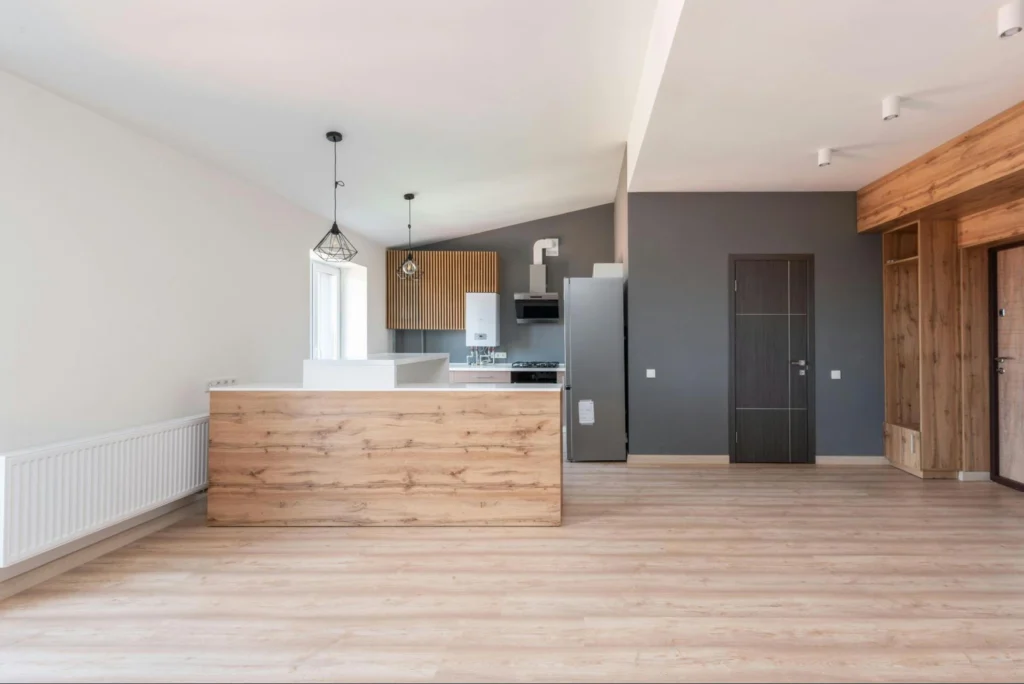
    The answer depends on the type of flooring and the conditions of the space. In many cases, especially with newer products like engineered wood or vinyl, acclimation can be unnecessary. These materials are crafted to withstand environmental changes better than traditional hardwood.

    Manufacturer guidelines are your best resource here. Some engineered wood and vinyl flooring products are pre-treated and stabilised, meaning they can be installed immediately without risk. Conversely, skipping acclimation for hardwood flooring can lead to significant issues, as it’s particularly susceptible to moisture changes.

    how to acclimate flooring

    Different Flooring Types and Their Acclimation Requirements

    Not all flooring materials are created equal when it comes to acclimation. While some demand careful preparation, others are far more forgiving. Understanding these differences is key to making informed decisions and ensuring a flawless installation.

    Flooring Type Acclimation Needed Key Considerations
    Hardwood Flooring Minimum 72 hours, potentially longer in humid areas Highly sensitive to moisture; prone to warping or gaps
    Engineered Wood Flooring Typically 24–48 hours More stable than hardwood but still benefits from acclimation
    Vinyl & Laminate Often no acclimation is required Designed to withstand environmental changes effectively

    By tailoring your approach to the specific needs of your flooring type, you can save time where possible while avoiding unnecessary risks. A little preparation goes a long way toward a successful, hassle-free installation.

    The Flooring Masters offers a wide selection of flooring options to suit every need. If you’re deciding on the perfect type, explore our extensive catalogue and order a free sample directly from our website.

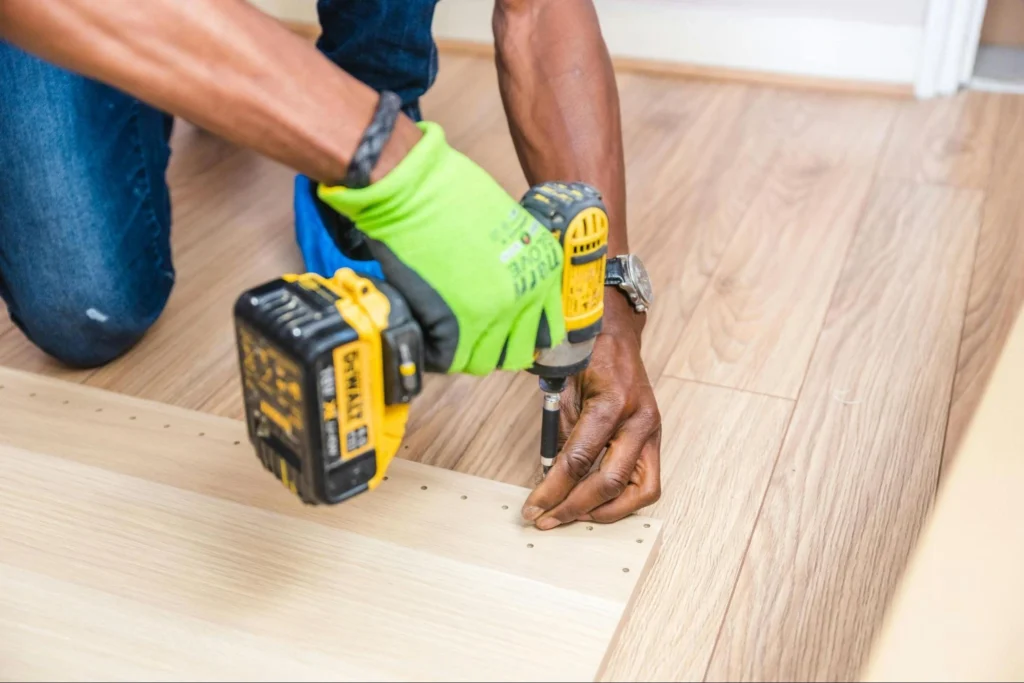
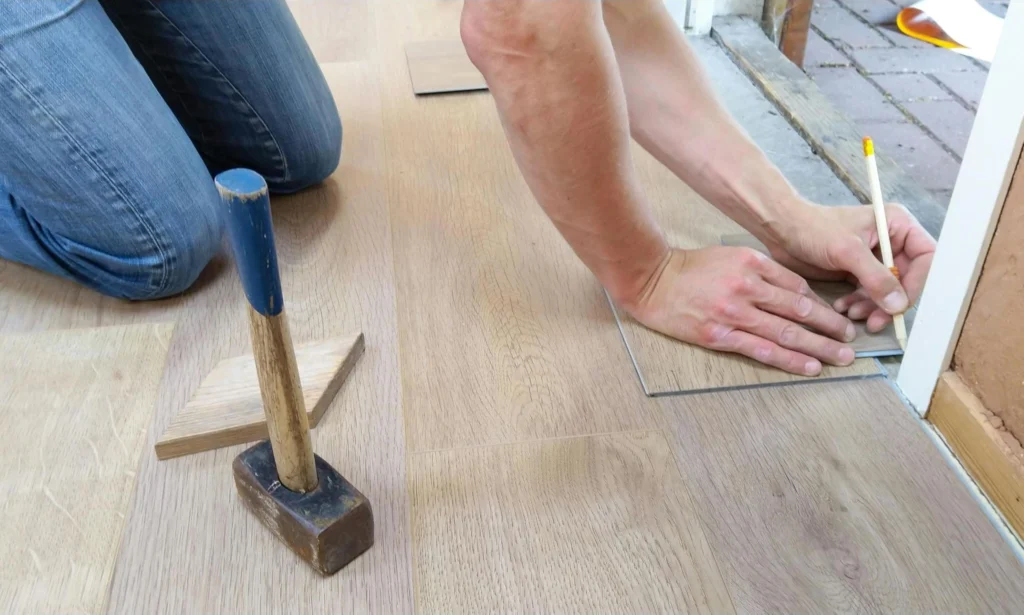
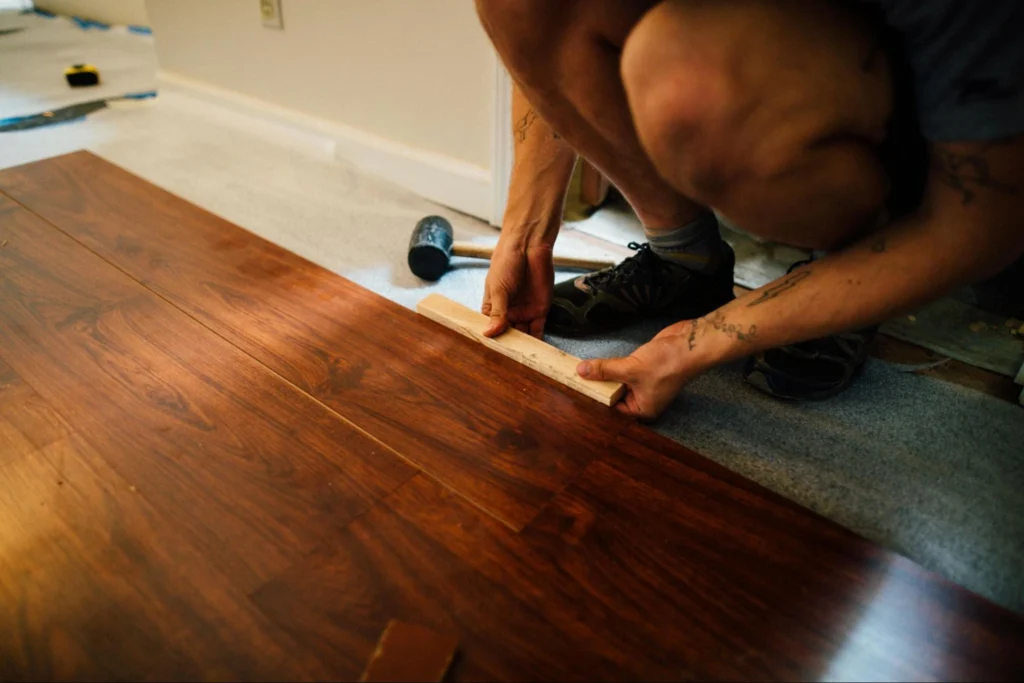
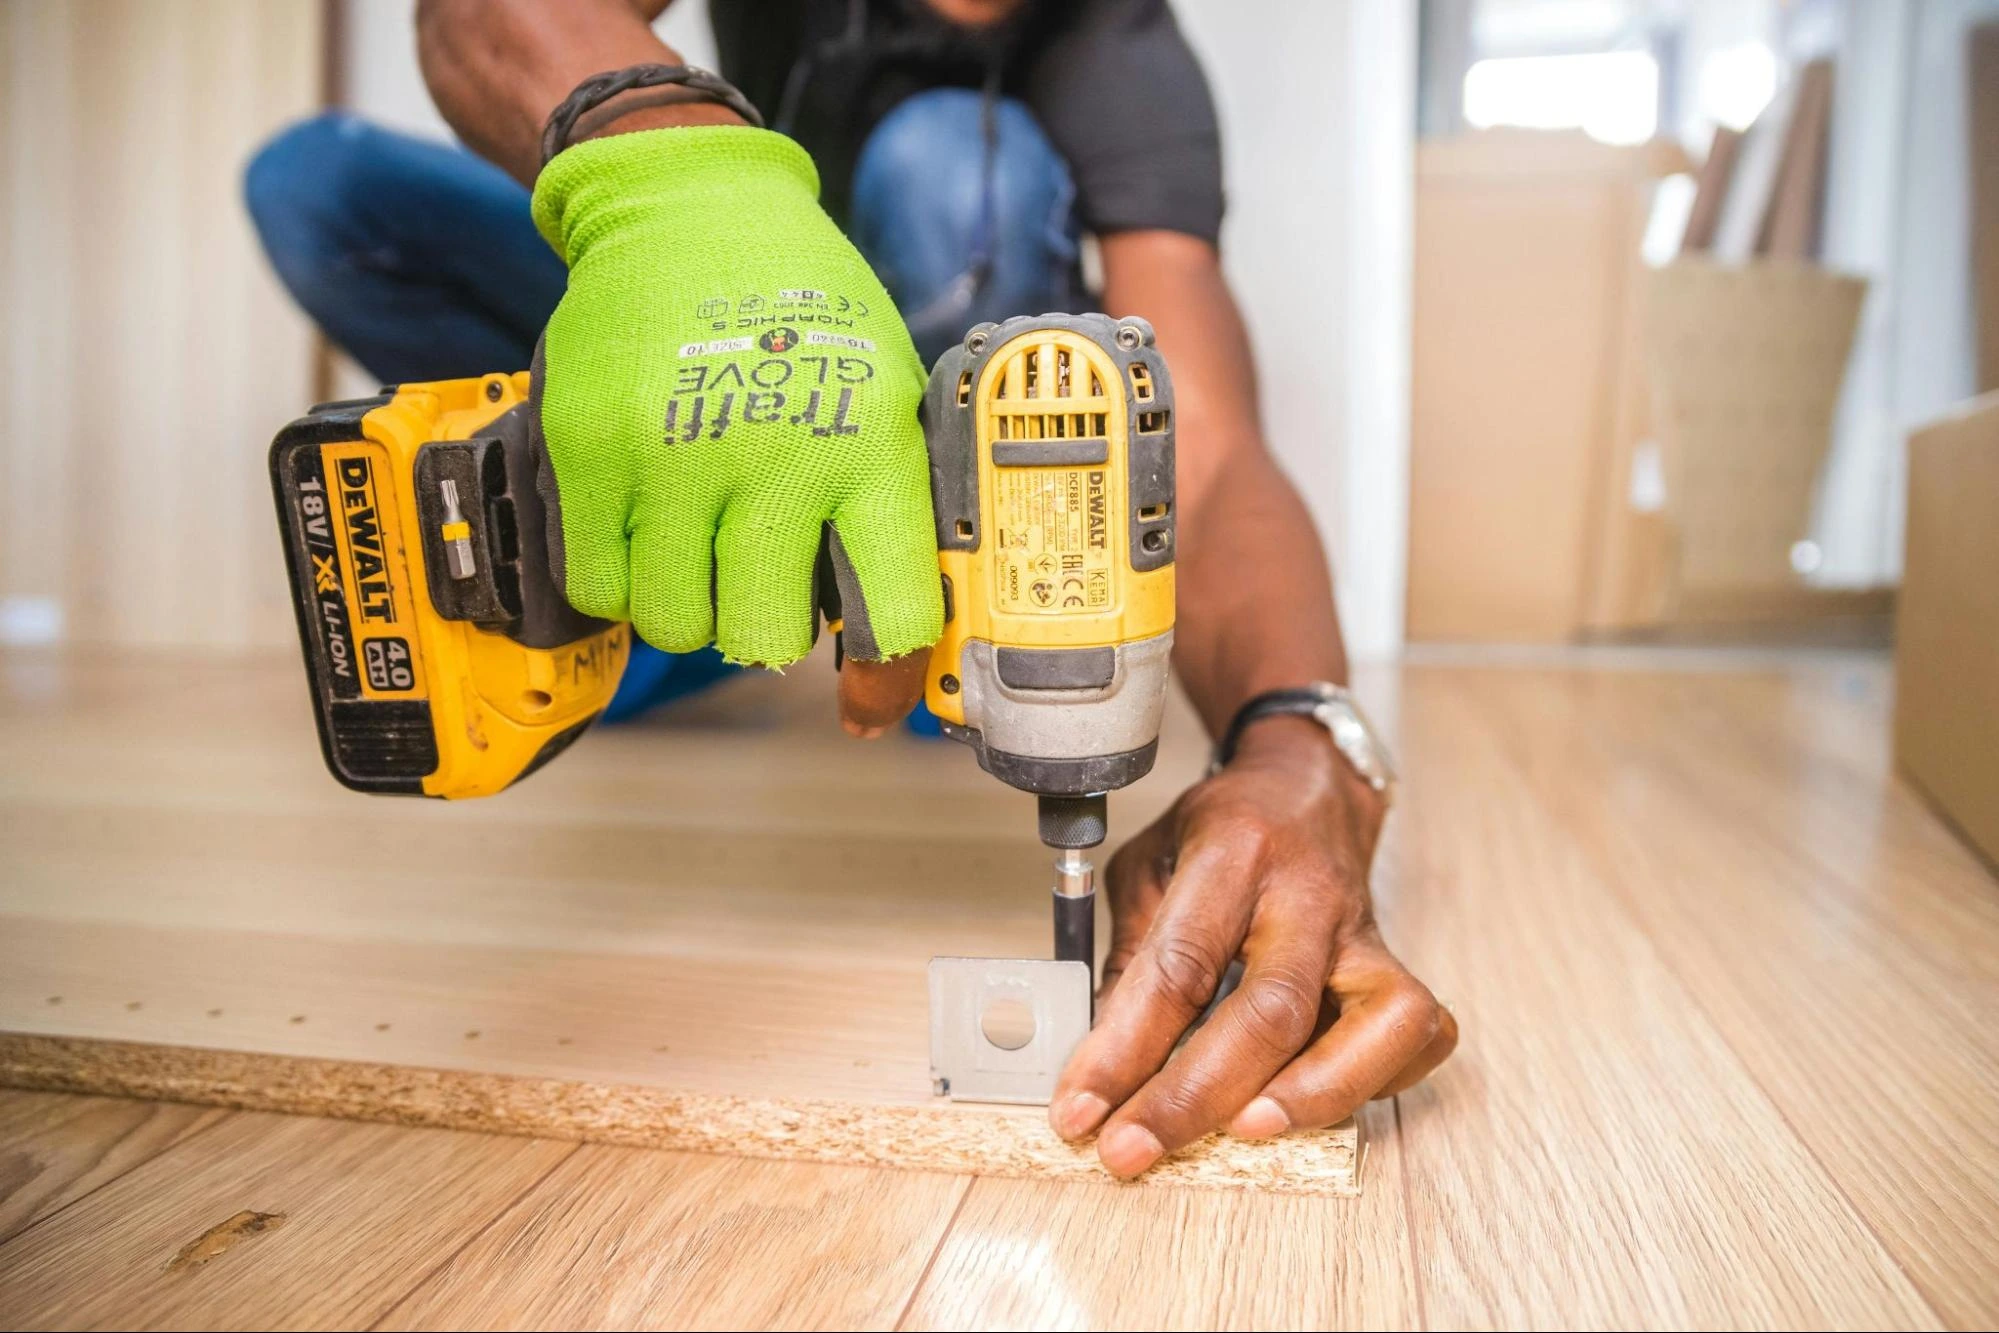
    Actionable Steps: How to Acclimate Flooring Properly

    If acclimation is required, follow this step-by-step guide to get it right:

    1.  Check Room Conditions: Measure the temperature and humidity of the installation space. Ideal conditions are usually between 18–24°C with 30–50% humidity.
    2.  Unpack the Flooring: Remove all packaging to allow the flooring to breathe and adjust to the room’s environment.
    3.  Spread Out the Planks: Lay the flooring planks flat and stack them in small piles, ensuring air can circulate each piece.
    4.  Monitor Progress: Use a hygrometer to ensure the flooring and the room have reached equilibrium. This may take anywhere from 24 hours to several days, depending on the material.

    By following these steps, you can ensure your flooring is fully acclimated, preventing any future problems or complications.

    The Cost of Skipping Acclimation: Worth the Risk?

    At first glance, skipping acclimation might seem like a quick way to streamline your project. However, the hidden costs of this decision—ranging from repairs to complete replacements—can be substantial. Let’s explore the potential financial risks.

    Problem Potential Cost Common Causes
    Warping £500–£2,000+ (depending on extent) Caused by rapid expansion due to humidity changes
    Buckling £1,000–£3,000 (full floor replacement) Flooring lifting from improper expansion gaps
    Gapping £200–£500 (minor repairs) Contraction from inadequate moisture adjustment

    Proper acclimation is a small investment of time compared to the hefty price of fixing problems later. By taking this crucial step, you can protect your flooring and enjoy peace of mind for years to come.

    Conclusion: To Acclimate or Not?

    The decision to acclimate flooring depends on multiple factors, including the type of flooring, the environment of the room, and the manufacturer’s recommendations. While some modern materials like vinyl and engineered wood may not require extended acclimation, traditional hardwood flooring almost always does.

    Before skipping this step, consider the potential risks and long-term costs. By following the guidelines outlined above, you can ensure a durable, flawless flooring installation.

    For high-quality flooring products and expert advice, trust The Flooring Masters to guide you through the process from start to finish.

  • What Are Vinyl Floor Tiles? Learn Before You Buy!

    What Are Vinyl Floor Tiles? Learn Before You Buy!

    Vinyl flooring tiles are a synthetic and budget-friendly flooring option that offers versatility for both residential and commercial spaces. These tiles are made from polyvinyl chloride (PVC) and are designed to mimic the appearance of natural materials like wood, stone, or ceramic. For homeowners or business owners seeking a stylish yet affordable alternative to pricier materials, vinyl tiles present an attractive solution.

    There are two primary types of vinyl flooring tiles: ‘Peel-and-Stick’ and ‘Click-Lock’. 

    • Peel-and-stick tiles come with a self-adhesive backing, making them easy to install by simply sticking them onto a smooth surface. 
    • Click-Lock tiles are installed through an interlocking mechanism, providing a more secure fit. While both are relatively easy to install, it’s essential to understand that they differ in durability and performance.

    For cost-conscious buyers, vinyl flooring tiles can be an excellent choice. However, understanding their expected durability, especially in comparison to other materials like laminate or engineered wood, is crucial before making a purchase.

    The Pros and Cons of Vinyl Flooring Tiles

    Pros of Vinyl Flooring Tiles

    Feature Description
    Affordability Budget-friendly option compared to laminate or engineered wood
    Durability Thicker wear layers provide good durability for higher-end vinyl
    Appearance Can mimic natural materials like wood, stone, or ceramic
    Installation Easy installation with Peel-and-Stick or Click-Lock options
    Maintenance Low-maintenance; easy to clean with regular sweeping and mopping
    Water Resistance Water-resistant, ideal for kitchens and bathrooms

    what are vinyl floor tiles

    Cons of Vinyl Flooring Tiles

    Feature Description
    Durability Cheaper vinyl may wear, peel, or fade more quickly
    Appearance Lower-end vinyl may not look as premium or realistic as other options
    Installation Peel-and-stick tiles may require more frequent repairs over time
    Maintenance Prone to scuffing, peeling, or fading in high-traffic areas
    Eco-Friendliness Derived from PVC, contributing to environmental and recycling concerns
    Longevity May not last as long as engineered wood or premium laminate

    Vinyl Flooring Tile Trends: Are They Right for You?

    In recent years, luxury vinyl tiles (LVT) have emerged as a popular trend. These tiles offer a more premium look and feel than traditional vinyl tiles, often closely resembling high-end materials like hardwood or stone.

    LVT is also more durable, making it a worthwhile investment for those who want the appearance of luxury without paying the price of real wood or stone. However, it’s essential to note that LVT does come with a higher price tag than standard vinyl tiles.

    At The Flooring Masters, we offer a range of luxury vinyl tile options. If you’re considering this choice for your home, why not request a free sample from our website to see if it’s the perfect fit for your space?

    Eco-Friendly Claims

    While some vinyl flooring brands tout eco-friendly credentials, it’s important to consider the materials used in their production. Being made from PVC, vinyl flooring does have environmental implications, particularly regarding VOC (volatile organic compound) emissions and recycling challenges. 

    However, there have been strides toward creating more sustainable vinyl options, so for environmentally-conscious buyers, researching the eco-friendliness of specific brands is advisable.

    Vinyl tiles can be a stylish, practical flooring choice, and options like LVT offer a touch of luxury. But buyers must weigh the benefits of aesthetics with environmental considerations.

    How to Choose the Best Vinyl Flooring for Your Space

    Selecting the right vinyl flooring for your space involves considering several factors that will affect both its appearance and longevity. Understanding your specific needs and the environment in which the flooring will be installed is crucial for making an informed decision. Here are some key pointers to help guide you through the selection process:

    Key Considerations for Choosing Vinyl Flooring

    1. Assess Foot Traffic Levels:

    Determine the level of foot traffic in the area. High-traffic spaces, such as entryways or living rooms, require more durable flooring.

    2. Select the Right Wear Layer Thickness:

    Choose vinyl tiles with a thicker wear layer (20 mil or higher) for areas with heavy use, as they are designed to resist scratches and dents.

    3. Evaluate Style and Design:

    Consider the aesthetic of your space. Vinyl flooring comes in various colours, patterns, and textures that can mimic natural materials like wood and stone.

    4. Check Waterproof Features:

    For moisture-prone areas, such as kitchens and bathrooms, opt for waterproof vinyl options to prevent water damage.

    what are vinyl floor tiles

    5. Compare with Other Flooring Types:

    Look at alternatives like laminate or engineered wood to evaluate their durability, maintenance needs, and overall value.

    6. Consider Installation Methods:

    Decide between Peel-and-Stick or Click-Lock vinyl options based on your DIY comfort level and the time you can dedicate to installation.

    By following these pointers, you can ensure that the vinyl flooring you choose not only meets your style preferences but also stands up to the demands of your living or working space.

    Waterproofing

    → One of vinyl’s standout features is its water resistance, making it a perfect fit for rooms like kitchens and bathrooms where moisture is a concern. 

    → However, be mindful that not all vinyl tiles are fully waterproof, and some may perform better in damp areas than others.

    Vinyl Flooring Maintenance: Key Tips for Longevity

    1.  Regular Sweeping: Sweep or vacuum regularly to remove dirt and debris, preventing scratches.
    2.  Gentle Mopping: Mop occasionally with a damp mop and a pH-balanced cleaner specifically for vinyl. Avoid excess water.
    3. Avoid Harsh Chemicals: Do not use bleach or abrasive cleaners; these can damage the wear layer.
    4.  Use Mats and Rugs: Place mats at entryways and rugs in high-traffic areas to protect the flooring.
    5.  Inspect for Damage: Regularly check for signs of peeling or scuffing. Address issues promptly to prevent further damage.
    6.  Repair Minor Issues: Use a vinyl repair kit for scratches or consult a professional for more extensive repairs.

      By focusing on these essential maintenance tips, you can effectively prolong the life and appearance of your vinyl flooring.


    Is Vinyl Flooring the Right Choice for You?

    Vinyl flooring tiles are an excellent choice for those on a budget who still want stylish, easy-to-install, and low-maintenance flooring. However, it’s important to balance your expectations, especially regarding durability and performance. For a more premium, longer-lasting solution, you might consider investing in higher-quality vinyl or even looking at laminate or engineered wood flooring options.

    If you’re ready to explore vinyl flooring options, check out The Flooring Masters’ extensive catalogue of vinyl tiles and request free samples to experience the quality firsthand before making your decision.

  • What is the Best Floor for Dogs Who Pee: Expert Advice

    What is the Best Floor for Dogs Who Pee: Expert Advice

    Owning a pet brings immense joy, but it also presents unique challenges for maintaining your floors. From accidental spills to inevitable scratches, your flooring often bears the brunt of daily pet life. Concerns like lingering odours, stains, and long-term wear can make choosing the right flooring a daunting task. Fortunately, flooring options are designed to handle pet ownership demands while keeping your home clean and inviting. 

    In this guide, we’ll discuss the best pet-friendly flooring options, helping you make an informed decision that suits your lifestyle and your furry companion.

    Flooring Options Based on Specific Needs

    Each home presents its own challenges, whether managing accidents, handling scratches, or accommodating active furry friends. By considering your specific needs, you can choose flooring that not only looks great but also withstands the wear and tear of daily life. 

    In this section, we’ll explore different flooring options designed to fit pet owners’ lifestyles, helping you create a space that works for you and your beloved companions.

    1. For New Pet Owners

    If you’ve just welcomed a new puppy into your home, accidents are bound to happen. Choosing a floor that is easy to clean and stain-resistant is crucial during this training phase. Luxury vinyl or tiles are excellent choices as they offer a surface that’s quick to clean and resistant to spills. Additionally, make use of free sample options to test which type suits your home best, allowing you to see how the floor withstands the wear and tear of an energetic pup.

    Tip: Place rugs in areas where your puppy spends the most time to prevent scratches and stains on your new floor during those early months.

    2. For Rental Property Owners

    As a landlord, balancing durability and affordability is key. Rental units are likely to see a lot of foot traffic—both from tenants and their pets. You need a flooring solution that looks great and is easy to maintain without constant upkeep. Laminate or vinyl flooring can be an affordable yet durable option, ensuring long-term value and tenant satisfaction. Flooring Masters offers a wide range of rental-friendly options, designed to keep your property looking fresh while withstanding years of use.

    Tip: Durable flooring doesn’t just benefit tenants; it also reduces the frequency and cost of repairs between lets, saving you money in the long run.

    what is the best flooring for dogs who pee

    3. For Allergy Sufferers

    If you or a family member suffer from allergies, hypoallergenic flooring can make a significant difference. Materials such as tile, cork, or engineered hardwood are ideal for minimising dust, dander, and pet hair. Pair these flooring choices with effective cleaning techniques to reduce allergens, ensuring a healthier home environment. Daily sweeping and mopping, coupled with a deeper clean using hypoallergenic products, will keep allergens at bay.

    Tip: Be sure to choose flooring that doesn’t trap allergens in seams or grout lines, which can contribute to long-term discomfort.

    4. For High-Traffic Areas

    Active dogs and pets in busy households can put a strain on your floors, especially in high-traffic areas like hallways and living rooms. For these spaces, consider scratch-resistant flooring options like tile, vinyl, or laminate. These durable materials will withstand your pet’s daily routines while remaining easy to maintain. Implementing a regular cleaning routine, such as vacuuming and mopping, will help keep these floors looking pristine for years to come.

    Tip: Invest in high-quality pet mats near entrances to catch mud, dirt, and debris, protecting your floors from additional wear and tear.

    Which Flooring Options Should Be Suitable?

    Each flooring material offers unique advantages that can cater to the needs of both your household and your furry friends. From the practicality of vinyl to the eco-friendliness of cork, understanding these options will help you make an informed decision. Here’s a comparison of the top pet-friendly flooring choices to consider. 

    what is the best flooring for dogs who pee

    Flooring Type Durability Ease Of Cleaning Comfort for Pets Water Resistance Scratch
    Resistance
    Eco-Friendliness Best For
    Vinyl Flooring High Very Easy Moderate High High Low Homes needing practical, low-maintenance flooring
    Tile Flooring Very High Easy Low Very High Very High Low High-moisture areas or homes with high pet traffic
    Cork Flooring Moderate Easy High (soft underfoot) Moderate Moderate High Allergy sufferers or eco-conscious pet owners
    Rubber Flooring High Very Easy High (soft underfoot) High High High Homes need comfortable, durable, and eco-friendly options
    Engineered Hardwood Moderate (with upkeep) Moderate High (natural feel) Moderate (depends on finish) Moderate (requires care) Moderate to High (depending on sourcing) Homeowners seeking a natural look with some pet-related care

    This comparison table makes it simpler to identify which flooring option best meets your specific needs. At The Flooring Masters, we offer a wide selection of flooring choices that can enhance both your home and provide comfort for your pets. Explore the diverse options on our website, and take advantage of our free sample service to find the perfect flooring solution for your space.

    what is the best flooring for dogs who pee

    Tips for Maintaining Pet-Friendly Floors

    Once you’ve chosen the right flooring, maintaining it is the next step to keeping it looking its best. Here are a few tips to help:

    Daily Cleaning:

    → A quick sweep or vacuum is essential to prevent pet hair, dirt, and dust from accumulating on your floors. For hard surfaces like vinyl and tile, a soft-bristle broom or vacuum designed for hard floors works best. A damp mop can be used on vinyl, tile, and other water-resistant flooring to keep them looking pristine. 

    → For added freshness, consider using a mild, pet-safe floor cleaner. Consistent daily upkeep not only maintains the appearance of your floors but also ensures a cleaner, healthier environment for your pets and family.

    Accident Cleanup:

    → Accidents are inevitable with pets, but quick action is key to preventing permanent stains or odours. Blot up any liquid spills immediately with a soft cloth or paper towel to stop moisture from seeping into the floor. Use pet-friendly cleaning products to eliminate odours and bacteria without causing damage to your flooring. 

    → For hardwood and other moisture-sensitive materials, ensure the area is completely dry after cleaning. This approach helps maintain a fresh-smelling home and keeps your floors looking like new for years to come. 

    Deeper Cleaning:

    → While daily cleaning routines can handle surface dirt, regular deep cleaning is crucial for maintaining the longevity and quality of your floors. Professional cleaning services can access the deeper layers of grime that accumulate over time, especially in grout lines or hard-to-reach areas. Deep cleaning can also revive the look of your flooring, restoring its original shine and lustre. 

    → For pet owners, this process is particularly important in high-traffic areas where wear and tear is more noticeable. Schedule these services a few times a year to keep your floors in top condition.

    Final Thoughts: Finding the Right Fit for You and Your Pets

    Selecting the right pet-friendly flooring is all about finding the perfect balance between durability, maintenance, and comfort for both you and your furry friends. Whether you opt for easy-to-clean vinyl, scratch-resistant tile, or eco-friendly cork, your floors should complement your lifestyle and meet the demands of your pets. 

    At Flooring Masters, we offer expert advice to help you make the best choice for your home. Plus, you can explore our wide range of flooring options and order free samples directly from our website, making it even easier to find the perfect fit. Contact us today and let us help you create a pet-friendly home that lasts.

  • How to Remove Floating Engineered Wood Flooring Without Damage

    How to Remove Floating Engineered Wood Flooring Without Damage

    Removing engineered wood flooring depends on several factors, including the condition of the floor, your plans for the space, and whether refinishing or repair is a more viable option. This guide is designed for those committed to removing their engineered wood flooring and need a clear, step-by-step breakdown of the process. It will help you evaluate whether to take on the project as a DIY effort or hire a professional for efficiency and expertise.

    Tools and Safety Gear—Are You Ready?

    Before you remove engineered wood flooring, ensure you have the right tools and safety gear. The correct tools will make the job easier, while safety gear protects you from injury. Both are essential for a successful DIY project.

    Essential Tools & Safety Gear

    Tool/Safety Gear Purpose Rental Cost Purchase Cost
    Pry Bar For prying up boards £5/day £15–£20
    Circular Saw To cut boards for glued-down floors £10/day £60–£100
    Scraper/Power Scraper Removing adhesive and residue £8/day £50–£80
    Respiratory Mask Protect against dust/adhesives £2–£5 £15–£30
    Goggles & Gloves Eye and hand protection £10–£20

    Skipping proper safety gear can result in injuries, particularly when working with tools like circular saws and scrapers. Make sure you’re prepared.

    how to remove engineered wood flooring

    Floating vs. Glued-Down Flooring: What Type Are You Removing?

    The installation method of your engineered wood flooring dictates how challenging the removal process will be. Floating floors are much easier to remove than glued-down ones. Here’s a quick comparison:

    Flooring Installation Types Comparison

    Type Description Ease Of Removal Tools Required
    Floating Boards interlock and float on top of the subfloor Easy Pry bar, handsaw, mallet
    Glues-Down Adhered directly to the subfloor using adhesives Difficult Circular saw, scraper, adhesive remover

    Knowing your floor type will help you plan the time, tools, and effort needed for removal.

    Step-by-Step Process for Removing Floating Engineered Wood Flooring

    Step 1: Prepare the Room

    • Clear the Space: Remove all furniture and items from the room.

    • Turn Off Power to the Room: If there are any electrical outlets near the floor, shut off the power to avoid accidents.

    • Remove Baseboards: Use a pry bar to gently remove the baseboards, which can be reused or replaced after removal.

    Step 2: Identify the Starting Point

    •  Locate the First Board: Begin in a corner of the room. Pry up a board that isn’t locked tightly to another, typically along the perimeter of the room.

    Step 3: Remove the First Board

    •  Use a Pry Bar: Slide the pry bar under the edge of the board and gently lift it. Use a mallet to help if necessary.

    Step 4: Dismantle the Floating Floor

    •  Work Across the Room: Once the first board is removed, work methodically across the room. Since floating floors use tongue-and-groove connections, the boards will come apart easily once you begin.

    •  Pry Each Board: Continue prying up boards row by row, being careful not to damage the boards if you plan to reuse them.

    Step 5: Inspect the Subfloor

    • Check for Damage: After removing all the boards, inspect the subfloor for damage or debris. If necessary, clean the subfloor to prepare it for new flooring.

    :how to remove engineered wood flooring

    Step-by-Step Process for Removing Glued-Down Engineered Wood Flooring

    Step 1: Prepare the Room

    • Clear the Room: Remove all furniture and items. Glued-down floors are more challenging to remove, so the area should be entirely free of obstacles.

    •  Turn Off Power: For safety, ensure the power to outlets near the floor is switched off.

    •  Remove Baseboards: Use a pry bar to carefully remove baseboards.

    Step 2: Cut the Flooring

    •  Set Circular Saw Depth: Adjust the circular saw to the thickness of the engineered wood flooring (not deeper than the subfloor).

    •  Make Cuts: Cut the floorboards into smaller sections, approximately 1 to 2 feet wide. These cuts make the boards easier to remove.

    Step 3: Pry Up the Boards

    •  Insert Pry Bar: After making cuts, use a pry bar to get underneath the boards and pry them up. Some boards may come off in pieces due to the adhesive.

    Step 4: Remove Adhesive Residue

    •  Use a Scraper: A power scraper or handheld scraper is needed to remove the adhesive left on the subfloor. Scrape thoroughly to ensure the surface is clean.

    Step 5: Soften Stubborn Adhesive

    • Use Adhesive Remover: For areas where the adhesive is too stubborn, apply a commercial adhesive remover. Follow the product’s instructions to soften the adhesive before scraping it off.

    Step 6: Inspect the Subfloor

    • Check for Damage: Once the glued-down boards and adhesive have been removed, check the subfloor for any damage caused by tools or the removal process.

    Step 7: Clean the Subfloor

    •  Vacuum and Wipe: Clean the subfloor to ensure it’s ready for new flooring. Use a vacuum to remove debris and wipe down any remaining residue.

    how to remove engineered wood flooring

    Subfloor Considerations—Why It Matters

    Your subfloor type plays a big role in the removal process. Removing flooring from plywood requires more care, while concrete subfloors are tougher but still susceptible to damage from tools.

    Subfloor Identification

    Subfloor Type Removal Approach Risk of Damage
    Plywood Use gentle methods to avoid cracking High
    Concrete Can withstand more force, but avoid using excessive pressure Medium

    how to remove engineered wood flooring

    Eco-Friendly Disposal—Don’t Skip This Step

    Once your floor is removed, disposal is the next big task. Incorrectly disposing of adhesives or wood can have environmental consequences. Be sure to recycle what you can and dispose of adhesives responsibly.

    Recycle Your Wood:

    Contact local recycling centres to see if they accept engineered wood. Many wood products can be repurposed or recycled into new materials. If your flooring is in good condition, consider donating it to charity or a local community project that may benefit from reusable flooring. You can also check if your flooring supplier offers a take-back scheme for recycling.

    Dispose of Adhesives Properly:

    Adhesives can contain harmful chemicals, making them unsuitable for general waste. Do not pour them down drains or throw them in the trash. Instead, take them to a designated hazardous waste disposal facility. Many local councils have special waste collection days for household chemicals and adhesives. You can also inquire about eco-friendly adhesive removers that are biodegradable and safer for disposal.

    Consider Upcycling Other Materials:

    If you have leftover underlay or padding, consider using it in other projects, such as insulation or for temporary flooring in garages or sheds. For scrap materials, check with local schools or DIY enthusiasts who may be interested in taking them off your hands for creative projects.

    Conclusion: Successfully Removing Engineered Wood Flooring – Your Next Steps

    Removing engineered wood flooring can be a rewarding yet demanding project, whether you’re upgrading to a new style or simply restoring your space. By following the step-by-step processes for both floating and glued-down floors, you can ensure a smooth removal without damaging your subfloor. Remember to take your time, use the right tools, and address common challenges like adhesive residue and subfloor protection. If you’re unsure or overwhelmed, hiring professionals can save you time and prevent costly mistakes.

    Whether you’re looking to replace or repair your engineered wood flooring, The Flooring Masters is here to help. Take the next step in your flooring journey—contact us for expert advice and find the perfect flooring solution for your space.

  • Is Engineered Wood Flooring Toxic? Health Facts and Safety Tips

    Is Engineered Wood Flooring Toxic? Health Facts and Safety Tips

    You’ve picked the perfect flooring – engineered wood, sleek, durable, and just what your home needs. But here’s a question that probably didn’t cross your mind while admiring those floorboards: Is engineered wood flooring toxic? Or Could it be affecting the air you breathe? It’s not something you see in the glossy brochures, but let’s dive into whether engineered wood flooring has any hidden, toxic secrets.

    With growing awareness about indoor air quality and the materials used in our homes, it’s essential to understand whether engineered wood could potentially impact the health of your family. Many worry about harmful chemicals, such as volatile organic compounds (VOCs) and formaldehyde, being released into the air from the adhesives and finishes used in these floors.

    In this guide, we’ll examine the composition of engineered wood, evaluate the potential health risks, and examine how modern manufacturing practices have adapted to address these concerns. Whether you’re renovating your home or building from scratch, understanding the safety of your flooring choices is crucial for creating a healthy and comfortable living environment.

    Why Engineered Wood Flooring Raises Health Concerns

    is engineered wood flooring toxic

    Understanding Potential Toxicity

    Although engineered wood is designed for strength and durability, the adhesives and finishes used can sometimes release VOCs. These chemicals can evaporate into the air and, with prolonged exposure, cause respiratory issues, headaches, or allergies in sensitive individuals.

    Have Modern Floors Addressed These Concerns?

    Improvements in Industry Standards

    Thankfully, the industry has recognised these concerns, leading to significant changes in manufacturing processes. Many companies now use low-VOC or formaldehyde-free adhesives, reducing the amount of harmful emissions in newer products. However, not all engineered wood floors meet these higher safety standards, so it’s essential to be vigilant when selecting your flooring.

    The Importance of Certifications

    Certifications like CARB2 (California Air Resources Board Phase 2) and GreenGuard help consumers identify products that meet stringent indoor air quality standards. Flooring that holds these certifications has been tested for VOC emissions and is generally considered safer for home environments.

    is engineered wood flooring toxic

    The Truth About VOCs and Indoor Air Quality

    What are VOCs?

    VOCs, or volatile organic compounds, are chemicals that easily become vapours or gases. These can come from the adhesives, finishes, and even the materials themselves used in engineered wood flooring. Prolonged exposure to high levels of VOCs can cause health issues, particularly in individuals with pre-existing conditions or sensitivities.

    Health Impacts

    While many people may not notice immediate effects, those with allergies, asthma, or other sensitivities could be more vulnerable to VOC emissions. It’s especially important to consider this if you have children or elderly family members living in your home, as they may be more susceptible to indoor pollutants.

    How to Choose Safer Engineered Wood Flooring

    When shopping for engineered wood flooring, prioritise products that are labelled as low-VOC or formaldehyde-free. Certifications such as GreenGuard ensure that a product meets strict emission limits. Several certifications indicate a product’s safety. Below is a comparison table for all the prominent certifications that should matter while selecting a flooring product. 

    Certification What It Ensures VOC Emission Limits Why It Matters
    BS EN 16516 Ensures compliance with European standards for VOC emissions ≤ 1 mg/m³ total VOCs The British Standard for VOC emissions in construction products, ensuring low emissions for healthier indoor air.
    E1 Emission Standard Limits formaldehyde emissions in wood-based products ≤ 0.1 ppm formaldehyde A European standard that ensures formaldehyde emissions in engineered wood are below harmful levels.
    GreenGuard Gold Provides stricter safety standards for sensitive indoor environments ≤ 220 µg/m³ total VOCs Recognised globally, but also common in the UK, ensuring safer air quality in homes, schools, and healthcare facilities.
    FSC Certification Verifies that wood is sourced sustainably from responsibly managed forests Not emission-
    related
    Guarantees that the wood is ethically sourced, ensuring the product is environmentally friendly as well as safe.
    BREEAM Certification Assesses the environmental, health, and safety performance of buildings Varies for material/product Widely used in the UK to ensure building materials, including flooring, meet strict environmental and safety standards.

    At The Flooring Masters, we offer a range of low-toxicity flooring options, ensuring that you can have both style and safety in your home. Have a look at the extensive product catalogue on our website, and order free samples of your preferred wood flooring. 

    Common Misconceptions About Safe Flooring

    Greenwashing in the Industry

    Unfortunately, not all products labelled as ‘non-toxic’ or ‘eco-friendly’ are as safe or sustainable as they claim. Some companies engage in ‘greenwashing’, using clever marketing tactics to present their products as healthier or more environmentally responsible than they really are. 

    This deceptive practice often involves highlighting one environmentally friendly aspect of a product, while ignoring the harmful elements. For instance, a flooring product might boast about being sourced from sustainable wood, but fail to disclose the high levels of VOCs in the adhesives or finishes used.

    To avoid falling for greenwashing, it’s crucial to look beyond the labels. Research the manufacturer’s overall environmental practices and check whether they hold valid certifications from trusted authorities like GreenGuard, FSC, or BREEAM. These certifications undergo rigorous testing and audits, ensuring that products meet specific safety and environmental standards. 

    When in doubt, don’t hesitate to ask questions about the product’s composition and manufacturing process. Transparency is key—if a company is reluctant to provide detailed information, it’s often a sign that something may not be as green or safe as advertised.

    is engineered wood flooring toxic

    Safe Doesn’t Mean Chemical-Free

    Even flooring marketed as ‘safe’ can still contain low levels of chemicals, especially in modern materials that undergo various treatments to enhance durability or aesthetics. It’s essential to understand that ‘safe’ does not necessarily mean ‘chemical-free. 

    Products may still emit small amounts of volatile organic compounds (VOCs) or other chemicals, though these are often within safe limits set by regulatory bodies. However, exposure to even minimal VOCs can still pose risks for sensitive individuals, including those with allergies, asthma, or other respiratory conditions.

    It’s important to differentiate between ‘no-VOC’, ‘low-VOC’, and ‘natural’ products to make informed decisions. 

    • A ‘no-VOC’ label means that the product is designed to release negligible levels of volatile compounds, 
    • While ‘low-VOC’ indicates that emissions are minimal but still present. 
    • Products marketed as ‘natural’ may not necessarily mean they are free from synthetic chemicals; some naturally sourced materials can still emit harmful gases or have undergone chemical treatments. 

    By carefully reading labels and reviewing certifications, you can select products that balance safety with performance, ensuring a healthier living space for your family.

    Can Eco-Friendly Products Be Both Safe and Durable?

    Finding the Balance Between Safety and Durability

    Eco-friendly doesn’t always equate to safety, and durability doesn’t always mean a product is healthy. When choosing engineered wood flooring, it’s important to balance these two factors. Some eco-friendly products focus solely on sustainability but may overlook the health impacts of chemical emissions.

    Additionally, a product’s environmental claims should be supported by certifications that guarantee safety and sustainability. For instance, a highly durable floor that relies on high-emission adhesives may pose long-term health risks, even though it lasts for years. 

    Similarly, a product that’s sustainably sourced but has a shorter lifespan may lead to more frequent replacements, increasing waste. Striking the right balance involves considering the entire lifecycle of the product—from production to longevity and its impact on health.

    Look for Dual Benefits

    The best flooring options offer a combination of durability, low emissions, and responsible sourcing. The right choice will tick both boxes: providing you with a long-lasting floor that also contributes to a healthier indoor environment.

    It’s also worth considering innovative finishes and adhesives that are both durable and safe. Some manufacturers are now offering plant-based or water-based adhesives that maintain high performance without relying on harmful chemicals. 

    By investing in a product that blends these dual benefits, you can ensure that your flooring not only stands up to wear and tear but also promotes a healthier home environment. This careful selection results in flooring that’s not only beautiful and sturdy but also contributes positively to your overall well-being.

    Conclusion: What’s the Verdict on Engineered Wood Flooring?

    Engineered wood flooring can be a safe and stylish option, but it’s crucial to be informed about the potential risks. By understanding what goes into your flooring, paying attention to VOC emissions, and looking for trusted certifications, you can make an informed decision that’s not only good for your home but also your health.

    Ultimately, your flooring decision shouldn’t be based solely on aesthetics or price. Safety should play a significant role, particularly if you have vulnerable individuals at home. By selecting low-VOC, certified products, you can enjoy the benefits of engineered wood flooring without compromising on indoor air quality.

    At The Flooring Masters, we’re here to guide you through the process of selecting the best-engineered wood flooring for your home. With our expertise and wide range of certified low-toxicity products, you can confidently choose a beautiful and safe floor. Contact us today for a consultation with our experts or explore our collection of engineered wood flooring to find the perfect fit for your space.

  • How to Replace Damaged Engineered Wood Floor in 7 Easy Steps

    How to Replace Damaged Engineered Wood Floor in 7 Easy Steps

    Engineered wood flooring has become a staple in modern homes, offering the warmth of real wood with enhanced stability. However, even this durable option isn’t resistant to the wear and tear of daily life. While engineered wood flooring is known for its durability and aesthetic appeal, it’s not immune to dents, scratches, or even water damage. 

    Many industry experts suggest that replacing individual boards can be significantly more cost-effective—sometimes saving up to 75% of the cost—compared to reinstalling the entire floor.

    In this guide, we’ll provide you with comprehensive, expert-backed solutions for DIY replacement of damaged engineered wood flooring, helping you save time and money.

    Understanding Engineered Wood Flooring Damage

    Understanding the specific types of damage that engineered wood flooring can sustain is vital for effective maintenance and repair. 

    • Moisture damage is a leading concern, often stemming from spills or high humidity levels, and can lead to warping or buckling. 
    • Heavy furniture can create deep dents, particularly in softer finishes, while scratches from pets or everyday use can detract from the floor’s appearance.
    • Additionally, UV exposure can result in discolouration, impacting the aesthetic of the flooring over time. 

    Recognising these issues not only aids in timely interventions but also helps in choosing the right solutions to preserve the beauty and functionality of your flooring.

    Expert Insight: 

    “The most common cause of damage we see is due to moisture issues, often from spills or high humidity levels. Understanding the source of the damage is key to preventing future occurrences.” — John Smith, Flooring Specialist

    Tools and Materials Checklist

    Before starting your DIY project, make sure you have the following tools and materials:

    Essential Tools (with Estimated Costs)

    • Circular saw (£50-£100)
    • Chisel and mallet (£15-£30)
    • Rubber mallet (£10-£15)
    • Wood glue (£5-£10)
    • Measuring tape (£5-£10)

    Materials Needed

    • Replacement boards (ensure they match your existing floor type)
    • Wood filler (for minor touch-ups)
    • Sandpaper (various grits)
    • Stain or finish to match existing flooring

    Mini-Guide: Where to Source Materials

    Local hardware stores or specialised flooring shops often have a variety of materials, including replacement boards, adhesives, and finishing products. Visiting these stores allows you to see and feel the materials before purchasing, ensuring a better match with your existing flooring. 

    1. Online Retailers:

    Websites like Amazon and eBay offer a wide selection of tools and materials, often at competitive prices. Look for high-rated products and read customer reviews to ensure quality. Additionally, websites like Wickes, B&Q, and Screwfix are excellent resources for sourcing professional-grade tools and flooring supplies in the UK.

    2. Manufacturer Direct:

    Lorem ipsum dolor sit amet, consectetur adipiscing elit. Ut elit tellus, luctus nec ullamcorper mattis, pulvinar dapibus leo.

    Many flooring manufacturers sell replacement boards and accessories directly through their websites. This can be particularly useful if your flooring is a specific brand or has a unique finish that’s hard to match elsewhere.

    3. Salvage Yards and Reclaimed Wood Suppliers:

    For older or discontinued flooring styles, salvage yards or reclaimed wood suppliers can be valuable resources. They offer unique and sustainable options that can seamlessly blend with your existing floor.

    Whether you prefer shopping in-store or online, be sure to compare prices, availability, and shipping times to find the best option for your project.

    Expert Tip: Don’t overlook tools like a proper dust mask and knee pads. Safety first!

    how to replace damaged engineered wood flooring

    Step-by-Step Replacement Process

    Replacing a damaged board might seem daunting, but with the right tools and guidance, it’s manageable even for beginners. Follow these steps carefully to achieve a seamless repair.

    Always wear safety glasses and a dust mask to protect yourself from flying debris and dust particles.

    Here is a step-by-step guide on how to replace damaged flooring:

    1. Assess the Damage

    • Thoroughly inspect the flooring. Check if the damage is limited to one board or affects multiple areas.  
    • Determine if full board replacement is necessary or if a wood filler and sanding can address minor issues.

    2. Gather Tools and Materials

    • Use the checklist above to ensure you have everything on hand.  
    • Opt for replacement boards from the same batch as your original flooring for a perfect match.

    3. Prepare the Area

    • Remove any furniture and clear the workspace.  
    • Use protective sheets to cover surrounding flooring and furniture.

    4. Remove the Damaged Board

    • Mark the damaged board clearly for cutting.  
    • Set your circular saw to the board’s thickness.  
    • Make relief cuts along the length of the damaged board, being careful not to cut into the subfloor.  
    • Use a chisel and mallet to remove the pieces of the board.  
    • Clean out any debris or old adhesive.

    5. Prepare the Replacement Board

    • Measure the exposed area precisely and cut the new board to size.  
    • Trim the tongue and groove as needed to fit. Slightly bevel the edges for a cleaner look if necessary.

    6. Install the New Board

    • Dry fit the board first to ensure a proper fit.  
    • Apply wood glue to the tongue and gently place the board into the gap.  
    • Use a rubber mallet to tap it into place.  
    • Clean any excess glue immediately.

    7. Finish and Blend

    • Sand down minor imperfections.  
    • Apply stain or finish to match the surrounding area.  
    • Allow adequate drying time before walking on the floor.

    Troubleshooting Section: Common Issues and Solutions

    If you notice gaps after installing the new board, use wood filler to fill in small spaces. For boards that don’t fit snugly, check your measurements and trim as needed. 

    • Uneven Surface: 

    If the new board sits higher or lower than the surrounding floor, ensure that all adhesive or debris has been properly cleared from the subfloor before installation. You may need to sand down minor high points or use a levelling compound for low areas.

    • Creaking or Squeaking Boards: 

    If the new board makes noise when stepped on, check that it’s securely fastened. Apply a small amount of wood glue to the underside and press firmly. For persistent issues, adding a few finishing nails can help secure the board and eliminate creaking.

    Is Replacement Necessary? Assessment and Alternatives

    Before deciding on a replacement, consider whether a repair might suffice. Use the decision tree below to determine whether your damaged boards can be repaired or need replacement.

    Decision Tree: When to Replace vs. When to Repair

    For minor surface scratches or dents, a simple repair kit can often restore the board to its former glory. However, deep gouges or water damage may require full board replacement.

    Here is a comparison table of repair options for different types of damage:

    Type of Damage Repair Option Replacement Needed
    Surface Scratches Wood Filler, Sanding No
    Deep Gouges Wood Filler, Sanding Possibly
    Water Damage Drying, Stain Removal Yes
    Warping/Buckling Reshaping, Drying Yes

    how to replace damaged engineered wood flooring

    Cost Analysis: Repair vs. Replacement

    When deciding between repairing or replacing engineered wood flooring, it’s crucial to weigh the costs involved. Minor repairs, such as fixing scratches or small chips, are relatively affordable while replacing individual boards can become pricier depending on the extent of the damage. The table below provides a detailed cost comparison to help you make an informed decision. 

    Type of Damage Repair Option Replacement Cost (Per Board)
    Superficial Scratches & Scuffs £10 – £20 Not applicable
    Deep Gouges & Chips £20 – £30 £30 – £50
    Water Damage (Localised) £20 – £40 £30 – £60
    Buckling or Warping Not Repairable £30 – £60
    Discolouration or Staining £15 – £30 (sanding & finish) £30 – £50
    Loose Boards or Squeaking £10 – £25 £30 – £50
    Widespread Damage or Old Floors Not Cost-effective to repair Not Cost-effective to repair

    Key Insights:

    1. Repairing Minor Damages: For issues like scratches or squeaking, repair is usually the most economical option.
    2. Localised Board Replacement: More severe damage, such as water damage or deep gouges, may necessitate replacing individual boards, which can quickly add up if multiple boards are affected.

    how to replace damaged engineered wood flooring

    DIY vs. Professional Replacement: Making the Right Choice

    Choosing between a DIY approach and hiring a professional can be challenging. Here’s a detailed breakdown to help you make the right choice.

    Pros and Cons Table

    Approach Pros Cons
    DIY Cost-effective, Flexible timing Requires skills, Time-consuming
    Requires skills, Time-consuming Expert finish, Warranty options Expensive, Scheduling challenges

    Cost Comparison

    Replacement Method Estimated Cost Description
    DIY Replacement (Single Board) £40 – £60 Cost includes materials like the replacement board, adhesive, and any necessary tools.
    Professional Replacement (Single Board) £100 – £150 Fee includes labour and materials provided by the professional, often ensuring a guaranteed finish.

    Difficulty Assessment for DIY Tasks

    Task Difficulty (1-10)
    Assessing Damage 3
    Removing Damaged Board 7
    Installing Replacement Board 5
    Finishing and Blending 4

    Expert Tip: 

    If you’re uncertain, it’s best to consult a professional. At The Flooring Masters, our experts are always available to provide advice tailored to your situation. 

    Preventing Future Damage: Maintenance and Care

    Proper care and maintenance can extend the life of your engineered wood flooring significantly. Establish a regular cleaning schedule and use products specifically designed for wood floors.

    Create a maintenance routine including regular sweeping, using a damp mop, and applying protective pads to furniture.

    Product Recommendations for Floor Protection

    • Furniture Pads: Prevent dents and scratches from heavy furniture.
    • Moisture Barriers: Protect your flooring from potential water damage.

    Conclusion

    Replacing damaged boards is often a straightforward process, saving you the cost and hassle of replacing the entire floor. By following our expert guide, you can ensure your engineered wood flooring remains as stunning as the day it was installed.

    For more information and expert advice, explore The Flooring Masters website, where you can order free samples and consult our specialists on any flooring-related queries.

  • Top 5 Flooring Options for Bathrooms: What Works, What Doesn’t

    Top 5 Flooring Options for Bathrooms: What Works, What Doesn’t

    Cost Factor Lacquered Finish Oiled Finish
    Initial Installation Cost £25-£35 per sq.m (average) £30-£40 per sq.m (average)
    Annual Maintenance Minimal (£10-£20 annually for cleaning products) Moderate (£20-£30 annually for re-oiling supplies)
    Repair Costs (for minor damage) £200-£400 (refinishing every 5-7 years) £50-£100 (spot re-oiling every 2-3 years)
    Refinishing (for major repairs) £1,500+ for full floor refinishing £500+ for full floor re-oiling
    10-Year Total Cost (Estimate) £2,500+ for a 20 sq.m room £1,800+ for a 20 sq.m room

    Did you know that 60% of homeowners regret their bathroom flooring choice within the first year? 

    You probably don’t want to be part of that crowd. The bathroom is one of the most moisture-prone areas in your home, and choosing the wrong flooring can lead to expensive repairs and safety issues.

    Recent surveys show that water damage, slippery surfaces, and high maintenance requirements are the top complaints among homeowners who’ve made poor flooring choices. 

    But don’t worry – by the end of this blog, you’ll know exactly how to avoid these costly mistakes and select the perfect flooring for your bathroom.

    Why Bathroom Flooring Needs to Be Different (Backed by Science)

    Your bathroom isn’t just any room – a unique environment that poses specific challenges for flooring materials. Water, humidity, and temperature fluctuations make bathrooms particularly demanding. In fact, bathrooms account for 50% of a home’s total moisture exposure!

    This high moisture content means your flooring needs to be waterproof and resistant to warping, mould, and mildew. Additionally, slip resistance is crucial for safety, especially in households with children or elderly members. The right flooring choice can mean the difference between a safe, comfortable space and a potential hazard.

    the best flooring for bathrooms

    Top 5 Bathroom Flooring Options (And Why You Should Reconsider the Popular Ones)

    Flooring Type Pros Cons Durability (years) Water Resistance (hours) Cost
    (£/sq ft)
    Porcelain Tile – Highly durable
    – Water-resistant
    – Wide variety of styles
    – Can be
    slippery
    – Cold
    underfoot
    – Expensive
    installation
    50+ 24+ 30 – 50
    Luxury Vinyl (LVP/LVT) – Affordable
    – Water-resistant
    – Easy to install
    – May emit
    VOCs
    – Less
    long-lasting
    than some
    options
    10-20 24+ 20 – 40
    Natural Stone – Luxurious
    appearance
    – Long-lasting if
    maintained
    – Needs
    regular
    sealing
    – Can be
    slippery
    – Expensive
    100+ 12 – 24
    (if sealed)
    50 – 100
    Concrete – Modern
    aesthetic
    – Durable when
    sealed
    – Cold
    underfoot
    – Porous if
    not sealed
    – Can be
    slippery
    – Cold
    underfoot
    – Porous if
    not sealed
    – Can be
    slippery
    2 – 24
    (depends on sealing)
    40 – 100
    Waterproof Laminate – Affordable
    – Works in
    low-traffic
    areas
    – Requires
    careful
    installation
    – Not ideal for high-moisture
    areas
    15-25 24 – 72 15 – 30

    At The Flooring Masters, we offer a wide range of Luxury Vinyl Tile options, which can help you to easily purchase them after making a considerate decision. You can try our free sample option, to see if the flooring is suitable for your bathrooms. 

    Materials You Should Avoid at All Costs

    1. Carpet: 

    • While it might seem cosy underfoot, carpet in bathrooms is a breeding ground for mould and mildew due to its absorbent nature. The constant exposure to moisture from showers and baths creates the perfect environment for bacteria and unpleasant odours. 
    • Even in half-baths, where water exposure is minimal, the risk of spills and humidity can cause long-term damage. Additionally, maintaining cleanliness can be challenging, as carpet is more likely to trap dust, dirt, and allergens compared to hard flooring surfaces.

    Solid Hardwood: 

    • Despite its warmth and natural aesthetic, moisture is hardwood’s worst enemy. Bathrooms are prone to fluctuating humidity levels, which cause the hardwood to expand, contract, and eventually warp.
    • Even with a perfect seal, water can seep through the seams, leading to swelling, cupping, and even rot over time. 
    • Once water damage occurs, repairs are often costly and sometimes irreparable, making solid hardwood a risky and high-maintenance choice for such a damp environment.
    1. Inexpensive Laminate: 

    • Cheap laminate may look appealing, but it swells and buckles with even the slightest exposure to water. The protective top layer of low-quality laminate can wear down quickly, leaving the underlying material vulnerable to damage from spills, steam, and humidity. 
    • If water seeps into the seams, it can cause the boards to lift and warp, leading to an uneven and unsightly floor. 
    • For those set on laminate, it’s essential to invest in waterproof options that are specifically designed to withstand the rigours of bathroom conditions.

    Make the Right Flooring Choice Based on Your Needs

    • For High-Traffic Bathrooms:

    Choose durable, waterproof options like porcelain tile or luxury vinyl. These materials handle constant moisture and foot traffic without compromising on style. Opt for textured or anti-slip finishes to prevent slips, and choose darker or patterned designs to hide dirt and wear. High abrasion resistance and robust warranties ensure long-lasting performance in busy households.

    • For Small Bathrooms:

    Opt for larger tiles (over 12×12 inches) to create fewer grout lines, making the space feel bigger and more open. Use light colours and reflective finishes to enhance brightness, and consider installing tiles diagonally or extending them up the walls to add depth and dimension.

    • For Low-Maintenance Needs:

    Luxury vinyl or waterproof laminate are perfect for easy cleaning and worry-free water resistance. They resist stains and scratches, making them ideal for households with kids or pets. Modern designs mimic wood or stone, offering a high-end look without the upkeep.

    If you’re still sceptical about your decision, you can make use of the expert advice option that we provide at The Flooring Masters, which will help you make your decision based on professional advice. 

    best bathroom floorings

    Hidden Costs of Bathroom Flooring: What No One Talks About

    While selecting bathroom flooring, it’s easy to get swept up by the allure of luxurious materials like porcelain and natural stone. However, these choices often come with hidden costs that can significantly impact your budget. From unexpected installation fees to ongoing maintenance expenses, many homeowners end up spending far more than they anticipated. Understanding these hidden costs is crucial to making an informed decision and avoiding unpleasant surprises down the line. 

    Flooring Material Installation Cost (per sq. ft.) Initial Installation Costs Maintenance Costs Total Cost Over 10 Years (per sq. ft.)
    Porcelain Tile £10–£20 £1000–£2000 (for 100 sq. ft.) £100–£300 (grout sealing, minor repairs) £1100–£2300
    Natural Stone £15–£30 £1500–£3000 (for 100 sq. ft.) £400–£600 (regular sealing, cleaning) £1900–£3600
    Luxury Vinyl Plank £3–£5 £300–£500 (for 100 sq. ft.) £100–£200 (occasional replacement) £400–£700
    Ceramic Tile £8–£15 £800–£1500 (for 100 sq. ft.) £80–£200 (grout maintenance) £880–£1700
    Engineered Wood £5–£10 £500–£1000 (for 100 sq. ft.) £150–£300 (resurfacing, minor repairs) £650–£1300
    Laminate Flooring £2–£4 £200–£400 (for 100 sq. ft.) £100–£200 (replacement after 10–15 years) £300–£600

    Notes:

    • Installation Costs are calculated based on a 100 sq. ft. bathroom.
    • Maintenance Costs include expenses like sealing, minor repairs, and potential replacement.
    • Total Cost Over 10 Years is an estimate of the combined installation and maintenance costs over a decade.

    Ultimately, your choice of bathroom flooring should balance style and practicality. While high-end options may seem enticing, the associated costs—both initial and long-term—can add up quickly. By factoring in these hidden expenses from the start, you can ensure that your investment not only enhances the beauty of your bathroom but also aligns with your financial expectations. Planning ahead means enjoying your new space without the stress of unforeseen costs.

    Don’t Rush Your Flooring Decision

    The best bathroom flooring isn’t just about looks or upfront cost—it’s about safety, durability, and long-term value. Prioritize waterproof materials, think about installation and maintenance costs, and consider your household’s specific needs.

    Don’t wait until you’re facing water damage or slip hazards. Reach out to The Flooring Masters for expert advice and get a personalized recommendation for your bathroom flooring today!

  • Is Engineered Wood Flooring Truly Waterproof? The Truth Revealed

    Is Engineered Wood Flooring Truly Waterproof? The Truth Revealed

    Many homeowners assume that engineered wood flooring is completely waterproof, just like a sturdy sheet of vinyl or laminate. However, this is a common misconception. In reality, engineered wood flooring has its limits when it comes to moisture protection. 

    This blog will challenge the assumption that engineered wood is a truly waterproof solution for your home. We’ll explore the realities of how this flooring material performs in damp environments, debunk some marketing myths, and highlight the areas where it is most prone to failure. Additionally, we’ll compare better alternatives that offer superior waterproofing capabilities.

    By the end of this blog, you’ll have a clearer understanding of engineered wood’s limits in terms of moisture resistance, enabling you to make a thoughtful decision about the best flooring choice for your home.

    The Reality of Engineered Wood Flooring and Moisture

    Engineered wood flooring is hardwood with a thin veneer of real wood on top, with multiple layers of plywood or other materials beneath. While this construction makes the flooring more dimensionally stable and moisture-resistant than solid hardwood, it does not make it completely waterproof.

    Over time, continuous exposure to water or high humidity can cause the core layers of engineered wood to swell, warp, or develop mould and mildew. This degradation often starts from the seams or gaps where moisture can seep in and work its way underneath the surface.

    is engineered wood flooring waterproof

    Marketing Myths: Is ‘Waterproof’ a Misleading Term?

    Many flooring brands use the term ‘waterproof’ when marketing engineered wood, which can be misleading. They may technically meet the criteria to be labelled “water-resistant,” but this doesn’t mean they can withstand prolonged or heavy exposure to moisture. As a result, customers often have unrealistic expectations about the product’s ability to prevent water damage.

    “I thought my engineered wood floors would be completely waterproof, but a small spill caused the seams to swell and the finish to peel,” says one frustrated homeowner in an online review.

    Areas Where Engineered Wood Flooring Fails

    Bathrooms, basements, and kitchens are notorious trouble spots for engineered wood flooring. The consistently high humidity and occasional water spills in these areas can quickly lead to unsightly and costly issues. Many homeowners have learned this lesson the hard way, only to face the hassle and expense of repairing or replacing the damaged flooring.

    “We installed engineered wood in our downstairs bathroom, and within a year, the floor was warped and stained from all the moisture,” recounts a disgruntled customer. “It ended up costing us thousands to rip it all up and start over.”

    To better understand the risks of using engineered wood in moisture-prone areas, here’s a comparison table:

    Room Engineered Wood Suitability Common Issues
    Bathrooms Not recommended
    • Warping and swelling due to high humidity
    • Staining from water splashes and spills
    • Damage to the core layers over time
    Basements Not recommended
    • Moisture intrusion from the concrete subfloor
    • Mould and mildew growth in high-humidity environments
    • Potential for rot and structural damage
    Kitchens Not recommended
    • Water spills from sinks, dishwashers, and
      appliances
    • Damage to the surface finish and core over time
    • Challenges with cleaning and maintaining the floor

    If you have your heart set on installing engineered wood flooring, it’s crucial to take extra precautions to protect it in these high-moisture areas. However, for the best long-term results, choosing a more waterproof flooring solution is generally recommended. 

    Still confused about this, head to The Flooring Masters expert advice centre, to clear all your doubts. 

    what is the best waterproof engineered wood flooring

    The Better Alternatives for Waterproof Floors

    Let’s say, you’re seeking a truly waterproof flooring solution, engineered wood may not be the best choice. Alternative options like luxury vinyl plank (LVP), tile, and waterproof laminate offer superior moisture resistance and durability, often at a similar or lower cost.

    To help you compare the top waterproof flooring options, here’s a side-by-side breakdown:

    Feature Luxury Vinyl Plank (LVP) Tile Waterproof Laminate
    Water Resistance Extremely waterproof (up to 100% rating) Completely waterproof Highly water-resistant, but not 100% waterproof
    Durability Highly durable, scratch and impact resistant Extremely durable, long-lasting Moderately durable, prone to wear over time
    Installation Relatively easy, floating or glue-down options Requires professional installation Moderate difficulty, floating installation
    Maintenance Easy clean-up, minimal upkeep Regular cleaning and sealing required Easy cleanup, avoid excessive moisture
    Design Options Wide range of wood, stone, and abstract looks Endless tile styles and patterns Limited to wood and stone-inspired looks
    Cost Moderately priced, £3-£8 per sq ft Variable, £10-£50+ per sq ft Typically more affordable, £2-£5 per sq ft

    For example, high-quality LVP flooring can achieve a water resistance rating of up to 100%, making it an excellent choice for bathrooms, laundry rooms, and other moisture-prone areas. Tile is also an exceptionally waterproof option, with the added benefit of a wide range of design possibilities.

    When choosing the best waterproof flooring for your home, carefully consider your budget, design preferences, and the moisture levels in each room. For expert advice and free sample products, be sure to visit The Flooring Masters website. 

    waterproof engineered wood flooring

    How to Protect Engineered Wood (If You Insist on Using It)

    If you have your heart set on installing engineered wood flooring, there are some steps you can take to help mitigate the risk of water damage:

    • Seal all perimeter edges and seams with a high-quality silicone sealant to prevent moisture intrusion.
    • Use a waterproof underlayment or moisture barrier beneath the flooring to create an additional layer of protection.
    • Be diligent about cleaning up spills promptly and avoid excessive wet mopping, which can lead to water seeping into the core.
    • Consult a professional flooring installer to ensure the product is properly fitted and maintained.

    Understand the Limits Before You Buy

    While engineered wood flooring can be a beautiful and practical choice for many homes, it’s important to understand its limitations when it comes to water resistance. If you expect 100% waterproof protection, engineered wood is likely not the right option. 

    Before making a purchase, carefully review the product warranties and consider the moisture levels in the areas where you plan to install the flooring. By understanding the risks and taking appropriate precautions, you can help ensure your engineered wood floors stand the test of time. The Flooring Masters provides different options for engineered wood flooring. Have a look! And make an informed purchase. 

    For expert advice and high-quality, waterproof flooring alternatives, be sure to visit The Flooring Masters website. 

  • Find Your Finish: Oiled vs Lacquered Engineered Wood Flooring

    Find Your Finish: Oiled vs Lacquered Engineered Wood Flooring

    Making the right decision for your flooring can be daunting—especially when choosing between finishes like oiled or lacquered. You want your floors to look beautiful, but you also need them to be practical. The wrong choice could leave you with extra maintenance or unexpected repair costs. So, how do you decide?

    Your floors are one of the most significant investments in your home, and choosing the wrong finish could turn that investment into a burden. Whether you’re after a polished sheen or a more natural look, understanding the differences between oiled and lacquered finishes will save you time, effort, and money in the long run. By the end of this article, you’ll know exactly which finish suits your home—and your lifestyle.

    Aesthetics: It’s More Than Just Looks

    At first glance, the choice between lacquered and oiled floors may seem straightforward: lacquered for modern, sleek homes, and oiled for rustic charm. But trends in interior design are evolving, and those distinctions are no longer so clear-cut. 

    Matte lacquer, for instance, is gaining popularity in contemporary spaces, offering a subtler, less reflective finish. On the other hand, oiled floors are being used in minimalist, Scandinavian designs, adding warmth and texture to otherwise simple interiors. 

    When making your decision, ask yourself: do you prefer a high-gloss finish or a raw, natural feel? Both finishes have the versatility to suit modern or traditional homes, so don’t let preconceived ideas limit your options.

    oiled or lacquered engineered wood flooring

    Durability & Wear: The Real Winner Might Surprise You

    Lacquered floors are known for their durability, forming a protective layer on the surface that guards against scratches and stains. However, that same layer is its downfall when damaged. Think of it as a shield: once it’s scratched, repairing it can be costly and difficult. 

    Oiled floors, by contrast, offer a different kind of protection. They absorb the oil into the wood, allowing scratches and scuffs to be easily repaired without refinishing the entire floor. It’s like armour—resilient, yet repairable.

    For high-traffic areas, homes with children, or spaces where pets roam, oiled floors can handle wear better over time. Use an infographic or chart to visualize how both finishes perform under these conditions, especially when deep scratches occur.

    Maintenance and Longevity: What’s Really the Low-Maintenance Option?

    Lacquered floors might seem like the lower-maintenance choice at first glance—after all, they don’t need regular re-oiling. But when they do need repairs or refinishing, it’s often a bigger project. Oiled floors, though requiring more frequent care upfront, offer easier, more affordable touch-ups over time.

    For the reader wondering which is the true low-maintenance option, here’s a quick guide:

    • Lacquered: Little to no regular upkeep, but more challenging and costly to repair once damaged.
    • Oiled: Requires regular re-application, but allows easy spot repairs that keep your floor looking fresh.

    By considering the long-term effort involved, you’ll see that what’s initially easier may not always be the best choice in the long run.

    Environmental and Health Considerations: What They Don’t Tell You

    You’ve likely heard about eco-friendly flooring finishes, but how often do we think about how they impact our health, specifically indoor air quality? 

    Oiled floors have a natural edge here. Since they don’t create a surface layer like lacquer, they don’t trap dust and dirt, making them better for homes where allergies or asthma are a concern. However, it’s essential to be mindful of the volatile organic compounds (VOCs) that some lacquers release during curing, which can negatively impact air quality.

    For those prioritizing health and environmental factors, an oiled finish might be the better choice.

    Cost Comparison: Upfront vs. Long-Term Investment

    It’s easy to look at the price tag of lacquered and oiled floors and think the decision is clear—lacquered tends to be cheaper upfront. But there’s more to the story.

    While oiled floors might require regular maintenance, they’re more affordable to repair. Lacquered floors, once damaged, often need costly refinishing. In the long term, oiled floors could save you money by avoiding expensive full-floor repairs.

    Cost Factor Lacquered Finish Oiled Finish
    Initial Installation Cost £25-£35 per sq.m (average) £30-£40 per sq.m (average)
    Annual Maintenance Minimal (£10-£20 annually for cleaning products) Moderate (£20-£30 annually for re-oiling supplies)
    Repair Costs (for minor damage) £200-£400 (refinishing every 5-7 years) £50-£100 (spot re-oiling every 2-3 years)
    Refinishing (for major repairs) £1,500+ for full floor refinishing £500+ for full floor re-oiling
    10-Year Total Cost (Estimate) £2,500+ for a 20 sq.m room £1,800+ for a 20 sq.m room

    Consider two homeowners: one with lacquered floors and one with oiled. Over ten years, the lacquered floor owner spends significantly more on repairs, while the oiled floor owner easily handles minor touch-ups. Think beyond the immediate price tag and consider the total lifecycle cost.

    Room Suitability: Which Finish Works Best Where?

    Traditionally, the advice has been simple: use oiled finishes in high-traffic areas like kitchens, and lacquered finishes in bedrooms and living rooms. But this generalization may not hold up for every home.

    In fact, hallways—often the most walked-on part of a house—can benefit from oiled finishes, as scratches can be touched up easily. Meanwhile, lacquered finishes can shine in guest rooms or other low-traffic spaces, maintaining their sleek appearance with minimal upkeep.

    Tailor your choice to the room type and the foot traffic it will endure. Families with kids or pets might find oiled finishes in main areas more practical, while lacquered finishes can provide an elegant look in lesser-used spaces.

    Final Verdict: Which One is Right for You?

    • For Lacquer Lovers: If you’re looking for minimal upkeep and a polished, modern look that lasts, lacquered floors might be your best option. The Flooring Masters have a unique lacquered flooring range in different wood flooring options which will help you find the perfect fit for your home.
    1. Lacquered Solid Wood Flooring
    2. Lacquered Engineered Wood Flooring 
    3. Lacquered Parquet Flooring
    • For Oiled Enthusiasts: Want a floor that ages gracefully and allows for easy touch-ups? Oiled floors offer a natural, timeless beauty that’s hard to beat. Check out our collection of oiled flooring options today.
    1. Oiled Solid Wood Flooring
    2. Oiled Engineered Wood Flooring 
    3. Oiled Parquet Flooring

    Still unsure? Why not see the finishes for yourself? Request a free sample of both lacquered and oiled finishes to experience the difference firsthand. If you’re still not sure which is right for your home, send us some photos, and we’ll offer expert advice tailored to your space.

  • Can You Steam Engineered Wood Flooring? What You Need to Know

    Can You Steam Engineered Wood Flooring? What You Need to Know

    Steam cleaning sounds like the perfect, chemical-free solution—until it meets your beautiful wooden floors. While it promises an eco-friendly, efficient way to keep your home clean, you might be unknowingly putting your hardwood floors at risk. Could it be doing more harm than good?

    Wood floors are an investment in style and value, but their natural materials make them sensitive to moisture and heat. The convenience of steam cleaning seems appealing, but can your floors handle it? What might seem like a quick cleaning fix could lead to long-term damage that costs more than you bargained for.

    Homeowners everywhere ask: Can I safely steam clean my wood floors without compromising their quality? In this guide, we’ll unpack the hidden risks of steam cleaning on wood, explain why even sealed floors may be at risk, and offer practical steps to keep your floors looking flawless without the gamble. Whether you’re a seasoned homeowner or just installed new flooring, understanding these risks is key to protecting your investment.

    Understanding the Risks of Steam Cleaning Wooden Floors

    What Happens When Wood Meets Steam?

    In short: trouble. Steam cleaning might seem like an effective way to deep clean your wood floors, but it can lead to warping, cracking, and irreversible damage if you’re not careful. When wood meets steam, the moisture and heat penetrate the surface, seeping into the crevices. This can cause long-term damage, such as swelling or cracking, that may not be immediately visible but will show when it’s too late. Older or unsealed wood floors are especially vulnerable, as they lack the protective layer needed to keep moisture out.

    Why Moisture and Heat Are the Enemies of Wood

    Excess moisture from steam saturates the wood, seeping into the fibres and breaking down its structural integrity. Over time, this causes long-term damage that goes beyond what can be seen on the surface. The combination of heat and moisture creates a double threat, as the expansion of the wood under heat further weakens its durability. Ultimately, regular steam cleaning may shorten the lifespan of your wood floors, turning a small mistake into a costly repair.

    can you steam clean a wooden floor

    Are There Conditions Where Steam Cleaning is Safe?

    Sealed vs. Unsealed Floors

    The condition of your wood floors plays a crucial role in determining whether they can withstand steam cleaning. Modern wooden floors, if sealed properly with waterproof finishes, may tolerate minimal steam cleaning. However, the key is in knowing whether your floors are adequately sealed.

    A simple way to test this is the ‘water bead test’. Drip a small amount of water on the surface of your floor. If the water forms beads, your floor is sealed, and it’s in better shape to handle limited exposure to steam. If the water soaks in, the floor is unsealed—this means steam cleaning is not an option.

    Even sealed floors aren’t entirely immune. Over time, heat and moisture can still penetrate the wood, damaging the wear layer and causing invisible issues below the surface. So while you might be safe if your floors are sealed, it’s still a gamble.

    Precautionary Measures for Steam Cleaning

    If you’re determined to use steam cleaning on your wooden floors, take the following precautions:

    • Low heat settings: Keep the heat as low as possible.
    • Minimal water: Use the smallest amount of water to avoid moisture saturation.
    • Quick drying: Dry the floor immediately after cleaning to prevent lingering moisture.

    Even with these measures, there’s no guarantee that your wood floors will remain unscathed. Regular exposure to heat and moisture may eventually degrade the protective seal, making your floors more susceptible to damage.

    Best Practices for Cleaning Wooden Floors

    https://www.pexels.com/photo/photo-of-sofa-in-front-wooden-table-3935324/

    Steam-Free Alternatives

    For the safest results, it’s best to avoid steam cleaning altogether. Instead, opt for hardwood floor cleaners designed to preserve your floor’s finish and prevent moisture damage. These cleaners are gentle on wood and offer long-lasting protection.

    For regular maintenance, use a ‘microfiber mop’ or ‘dry cleaning techniques’. These methods are far safer for wooden floors, as they don’t introduce any moisture that could lead to long-term damage.

    If you’re dead set on using steam, here’s how to do it safely. Keep the heat low, use minimal water, and dry the area immediately after. But even with these precautions, it’s a risk. Once the protective layer is compromised, the damage is irreversible.

    When Professional Help is Necessary

    Sometimes, no amount of home cleaning can match the expertise of a professional. For deep cleaning or when in doubt, consulting a professional is always the safer option. Professionals can assess your floor’s condition and recommend cleaning methods that will preserve its beauty and longevity.

    At The Flooring Masters, we offer expert advice tailored to your specific flooring needs, ensuring your wood floors remain as stunning as the day they were installed. If you’re unsure about how to care for your wood floors, don’t hesitate to reach out for personalised recommendations.

    The Future of Steam Cleaning – Can Modern Steamers Make a Difference?

    Are steam cleaners safe for wood floors?

    With advancements in steam cleaning technology, some steamers are now marketed specifically for hardwood floors. But does this mean they’re safe? In theory, these steamers are designed to minimise the risks associated with traditional steam cleaning. They use lower heat settings and less water, which reduces the chances of damage.

    However, no steam cleaner can change the fundamental relationship between wood and moisture. Even the safest, most technologically advanced steam cleaner carries risks. So while some products may claim to be hardwood-friendly, it’s important to use them sparingly and always with caution.

    Wrapping It Up – To Steam or Not to Steam?

    At first glance, steam cleaning might seem like a convenient, eco-friendly solution. However, when it comes to wooden floors, the risks far outweigh the benefits. Unless your floors are fully sealed and you follow strict precautions, it’s best to stick to traditional hardwood cleaners.

    Remember, steam and wood are natural enemies. The safest course of action is to rely on cleaning methods that preserve the integrity of your floors, ensuring they stay flawless for years to come.

    If you’re still unsure whether steam cleaning is the right choice, it’s always better to err on the side of caution. The Flooring Master offers expert advice services,  to help you care for your wooden floors. Contact us today for tailored recommendations—and don’t forget to order your free flooring samples to discover beautiful, durable options that suit your home perfectly.

  • Can You Steam Engineered Wood Flooring? What You Need to Know

    Can You Steam Engineered Wood Flooring? What You Need to Know

    Understanding Engineered Wood Flooring

    Not all wood floors are created equal—and the difference might cost you. While many homeowners believe sanding is the go-to solution for worn-out floors, engineered wood flooring tells a different story. Unlike traditional hardwood, engineered wood has unique maintenance needs that impact its longevity.

    So, what exactly is engineered wood? It’s a layered floor composed of a hardwood veneer on top of plywood, designed to offer both durability and aesthetic appeal. But when it comes to scratches or damage, sanding may not always be the best fix. To know more, we explain everything about engineered wood flooring in our blog here. 

    Can sanding actually rescue your engineered wood floors? Let’s break it down.

    The Composition of Engineered Wood Flooring

    What really matters? The wear layer—essentially the shield that keeps your floor from looking like it’s been through a war zone. This top layer is the only part that can be sanded down, and its thickness dictates whether sanding is even an option for repairing scratches or damage.

    To keep it simple, think of solid hardwood as a tank—thick, durable, and built to withstand almost anything. Engineered wood, on the other hand, is like a tank with thin armour. It’s cost-effective and looks great, but it’s not built to take on the heavy artillery of years of wear and tear.

    engineered wood flooring sanding

    Can You Sand Engineered Wood Flooring?

    Yes, you can sand engineered wood floors, but most people do it wrong. Here’s how to avoid disaster. Sanding is only possible if the wear layer—the hardwood veneer on top—is thick enough, typically between 2-4 mm. If it’s thinner, sanding could easily break through to the plywood core, leaving your floor irreparably damaged.

    Over 60% of homeowners attempt sanding without checking their wear layer, resulting in irreversible damage. This is why quality matters. Good quality engineered wood flooring, with a thicker wear layer, makes all the difference in whether you can restore it over time.

    It’s necessary to choose the flooring that will last. The Flooring Masters offers high-quality engineered wood floors with thicker wear layers. Order your free samples today and see the difference for yourself. 

    When to Sand and When Not to Sand

    Sanding should be a last resort—not your first instinct. While it can bring new life to your engineered wood flooring, it’s not always the best solution. Here’s when sanding is worth it, and when you might regret it.

    When to Sand:

    • Minor surface scratches
    • Dullness or loss of shine
    • Light discoloration or fading

    When Not to Sand:

    • Wear layers thinner than 1.5 mm
    • Deep scratches that penetrate the surface
    • Water damage, warping, or significant staining

    In these cases, sanding could do more harm than good, potentially exposing the core layers and damaging your floors beyond repair. Knowing when to sand and when to explore other options is key to maintaining your floor’s beauty and longevity.

    can you varnish engineered wood flooring

    How to Sand Engineered Wood Flooring

    Sanding is a risky business. Avoid sanding right through that precious top layer by following these critical steps to protect your floor and ensure a smooth finish.

    • Test First

    Before you dive in, test the sander in an inconspicuous spot—like behind a door or under a rug. This step ensures that the wear layer can handle the sanding without immediate damage, helping you avoid costly mistakes.

    • Use Fine-Grit Sandpaper 

    Fine-grit sandpaper (120-150 grit) is your best friend. It helps you smooth out light scratches without stripping away too much of the wear layer. Coarser grits can be too aggressive, risking irreversible thinning of the top layer.

    • Sand Lightly and Evenly  

    Apply gentle, even pressure when sanding to prevent thinning in certain areas. Don’t linger too long on any spot, especially near seams where the top layer might be thinner.

    • Be Careful Around Edges and Corners 

    Edges and corners are particularly vulnerable to over-sanding. Use caution in these areas by switching to hand sanding or reducing pressure to avoid going too deep.

    By following these steps and taking your time, you can bring new life to your engineered wood flooring while minimizing the risks of damaging it.

    can you stain engineered wood flooring

    Refinishing After Sanding

    After sanding, applying the right stain and sealant is critical. This final step can either make your floor look brand new or ruin all your hard work. Choosing the right products and taking care during application is key to achieving a smooth, durable finish.

    When selecting a stain, consider the colour and tone that will complement your space. High-quality stains penetrate the wood evenly and provide a consistent finish. After the stain, a sealant is crucial for protecting the surface from future wear and tear, ensuring the wood remains durable and resistant to scratches or spills.

    Common Mistakes to Avoid:

    • Rushing the drying time: One of the most common mistakes is moving furniture back in too soon. The finish might feel dry to the touch, but it often needs several days to fully cure. Moving items prematurely can lead to dents, scratches, or even a ruined finish.
    • Skipping the sanding between coats: For an even and professional finish, lightly sand the floor between coats of stain or sealant. This smooths out any rough spots and ensures the next layer adheres properly.

    Taking these precautions will ensure your floors look their best and stay protected for the long haul.

    Alternatives to Sanding: When Refinishing Isn’t an Option

    Can’t sand your engineered wood floors? Don’t worry—there are alternatives that can still give your floors a refreshed look without risking damage to the wear layer. These methods are particularly useful when the wear layer is too thin to sand, or you simply want a less invasive option.

    Alternative Pros Cons
    Scratch Repair Kits Quick and easy to apply. |
    Affordable DIY option. |
    Can match the wood color for a seamless look.
    Works only for small, minor scratches. |
    Temporary solution; may require reapplication.
    Recoating Refreshes the surface without sanding. |
    Adds a new protective layer. |
    Easy application process.
    Limited to minor surface damage. |
    Doesn’t fix deep scratches or water damage.
    Floor Polishing Quick and cost-effective way to restore shine. |
    Enhances floor’s appearance in hours.
    Only improves surface aesthetics. |
    Doesn’t address scratches, dents, or deep damage.
    Floor Coverings Protects high-traffic areas from further damage. |
    Stylish and practical solution.
    Hides the flooring beneath. |
    Not a permanent fix for existing damage.

    Each alternative has its pros and cons, but they offer solutions for maintaining the beauty of your engineered wood floors without the need for invasive sanding. Explore the option that best suits your flooring’s condition and your long-term needs.

    Should You Sand Your Engineered Wood Flooring?

    Whether sanding is right for your engineered wood floors depends entirely on your wear layer thickness—and your risk tolerance. If your floor’s wear layer is thick enough, sanding can extend its life, but if it’s too thin, you risk permanent damage that could be costly to fix.

    Not sure? Don’t gamble with your home’s value. Book a consultation with us today to avoid making an expensive mistake that could reduce the longevity and appearance of your floors.

    Save yourself future headaches by choosing high-quality engineered wood flooring from the start that also lasts longer. Order your free samples from The Flooring Masters and make a smart investment in your home’s future.

  • Is Engineered Wood Flooring Suitable for Kitchens? Pros and Cons

    Is Engineered Wood Flooring Suitable for Kitchens? Pros and Cons

    When renovating your kitchen, choosing the right flooring is crucial. Engineered wood flooring is a popular option, offering the beauty of real wood with additional durability and moisture resistance. In this guide, we’ll explore the pros and cons of using engineered wood flooring in the kitchen, how it compares to other options, and provide tips for selecting and maintaining it.

    What is Engineered Wood Flooring?

    Engineered wood flooring is a type of flooring made from layers of wood pressed together, topped with a real wood veneer. Unlike solid wood, which is made from a single piece of timber, engineered wood consists of multiple layers that contribute to its stability and durability.  

    The construction typically includes a hardwood top layer and several layers of plywood or fibreboard underneath. This layered structure allows engineered wood to withstand more moisture and temperature fluctuations than solid wood, while still providing the authentic look of natural wood. 

    For a more in-depth explanation, check out our blog on all things engineered wood flooring.

    Pros of Engineered Wood Flooring in the Kitchen

    Pro’s Details
    Durability and Longevity Withstands foot traffic and daily kitchen use without wearing out quickly.
    Moisture Resistance Better at handling humidity and occasional spills than solid wood flooring.
    Aesthetic Variety Available in a wide range of styles, colours, and finishes to suit any design.
    Ease of Installation Installation methods like click-lock systems make it quick and easy to lay.

    what are the disadvantages of engineered wood flooring

    1. Durability and Longevity

    Engineered wood flooring is an excellent choice for high-traffic areas like the kitchen. Its multi-layered construction gives it the strength to handle heavy foot traffic and the wear and tear that comes with daily kitchen use. Engineered wood resists the expansion and contraction caused by temperature fluctuations, such as those that occur during cooking. This makes it highly durable in a kitchen environment where heat and temperature changes are frequent.

    2. Moisture Resistance

    In the kitchen, where humidity and spills are common, engineered wood outperforms solid wood. It has a layered design that helps reduce the risk of warping due to moisture, making it more resistant to spills and splashes. However, while engineered wood is better at handling moisture than solid wood, it’s still crucial to clean up spills quickly to avoid long-term damage. Proper maintenance can ensure it remains a strong and reliable flooring choice for kitchens.

    3. Aesthetic Variety

    Engineered wood flooring offers a wide range of aesthetic options to suit any kitchen style. From sleek modern finishes to more rustic or traditional wood tones, there’s a design to complement any kitchen décor. Whether you’re pairing it with light or dark cabinetry, engineered wood provides the natural beauty of wood with the versatility to fit various kitchen styles, enhancing the overall look of the space.

    4. Ease of Installation

    The installation of engineered wood flooring in the kitchen is straightforward, thanks to easy-to-use systems like click-lock or glue-down methods. Click-lock systems, in particular, make the process quick and efficient, reducing the installation time significantly compared to other flooring options. This not only makes it a convenient choice for kitchen renovations but also limits disruption during installation, allowing you to enjoy your new kitchen floor sooner.

    Cons of Engineered Wood Flooring in the Kitchen

    Cons Details
    Moisture and Limitation Prolonged exposure to water can still damage the flooring over time.
    Susceptibility to Scratches It can be scratched or dented by heavy objects, pets, or furniture.
    Cost Considerations More expensive than laminate or vinyl but cheaper than solid wood.
    Maintenance Requirements Requires regular cleaning and occasional refinishing to maintain its appearance.

    1. Moisture Limitations

    While engineered wood flooring is more moisture-resistant than solid wood, it’s not completely impervious to water damage. In a kitchen, where spills and splashes are frequent, prolonged exposure to moisture can still cause the wood to swell or warp over time. To reduce these risks, regular maintenance is essential, including sealing the floor and wiping up spills promptly. Placing rugs or mats near sinks and dishwashers can also help prevent excess moisture from seeping into the flooring.

    2. Potential for Scratches and Dents

    Engineered wood is durable, but it can still be scratched or dented in a busy kitchen. Dropping heavy pots, dragging furniture, or even everyday wear from pets can cause visible damage. To protect the floor, it’s a good idea to use felt pads under furniture legs and avoid dragging objects across the surface. Rugs in high-traffic areas or near cooking stations can help protect the floor, while regular cleaning can prevent dirt and grit from scratching the surface.  

    pros and cons of engineered wood flooring

    3. Cost Considerations

    Engineered wood flooring typically comes at a mid-range price, making it a more affordable option compared to solid wood while still offering a high-end appearance. However, it’s more expensive than options like laminate or vinyl. Over time, maintenance costs, such as refinishing, may add up, but the long-term durability of engineered wood often justifies the initial investment. For those seeking the beauty of wood with practical benefits, it remains a cost-effective solution for kitchens.

    4. Maintenance Requirements

    To keep engineered wood flooring in top shape, regular cleaning is necessary. Dirt and debris can scratch the surface, so sweeping or vacuuming is important. While engineered wood is generally low-maintenance, refinishing might be required after years of wear, depending on the thickness of the top veneer. It’s also important to avoid harsh chemical cleaners that could damage the finish. A simple cleaning routine and occasional maintenance will help preserve the floor’s beauty and extend its lifespan in the kitchen.

    Comparison with Other Flooring Options

    engineered wood flooring pros and cons

    It’s essential to compare different options while selecting flooring for your Kitchen. Engineered wood, solid wood, and laminate are three popular choices, each with its own set of advantages and drawbacks. Understanding how they perform in terms of durability, moisture resistance, cost, and ease of installation can help you make an informed decision.

    Aspect Engineered Wood Solid Wood Laminate
    Durability Highly durable, stable, and less prone to warping Durable but prone to expansion and contraction Less durable; more prone to scratches and wear
    Moisture Resistance Handles moisture better, ideal for kitchens Poor moisture resistance, not suitable for kitchens Limited moisture resistance, can swell with water exposure
    Cost Mid-range pricing Higher initial cost Generally the most affordable
    Visual Appeal Natural wood veneer, authentic appearance Genuine wood with natural grain Imitates wood but lacks natural texture
    Ease of Installation Click-lock and glue-down options are easier to install Requires more skill to install Easiest to install, great for DIY projects
    Maintenance Requires occasional refinishing and regular cleaning Can be refinished multiple times but needs care Low maintenance but less repairable long-term

    In conclusion, each flooring option has its strengths and weaknesses. Ultimately, your choice should depend on your budget, the look you want, and how much maintenance you’re willing to invest. If you’re looking to explore a range of flooring options, The Flooring Masters offers a diverse selection to suit different styles and needs.

    Tips for Choosing and Maintaining Engineered Wood Flooring

    Selection Tips

    When choosing engineered wood flooring for your kitchen, consider the finish and thickness of the top veneer. Thicker veneers can be refinished more times, extending the lifespan of the floor. Also, opt for a finish that complements your kitchen’s overall aesthetic, whether it’s a glossy modern look or a matte rustic feel.

    Maintenance Advice

    To maintain your engineered wood flooring, sweep or vacuum regularly to avoid dirt buildup. Clean spills immediately to prevent moisture from penetrating the wood. Additionally, consider refinishing the floor every few years if the top layer allows it, and use mats or rugs in high-traffic areas to protect the surface.

    Why Choose Engineered Wood Flooring for Your Kitchen?

    Engineered wood flooring is a stylish and practical choice for kitchens, offering durability, moisture resistance, and a range of aesthetic options. While there are some moisture limitations and maintenance requirements, the pros often outweigh the cons, especially when compared to other flooring options.

    Why Choose The Flooring Masters?

    At The Flooring Masters, we offer a wide selection of high-quality engineered wood flooring that can elevate the look of your kitchen. Our experts are here to help you find the perfect match for your design and practical needs. Request a free sample or consult with our team for personalised advice on your kitchen renovation from our website.